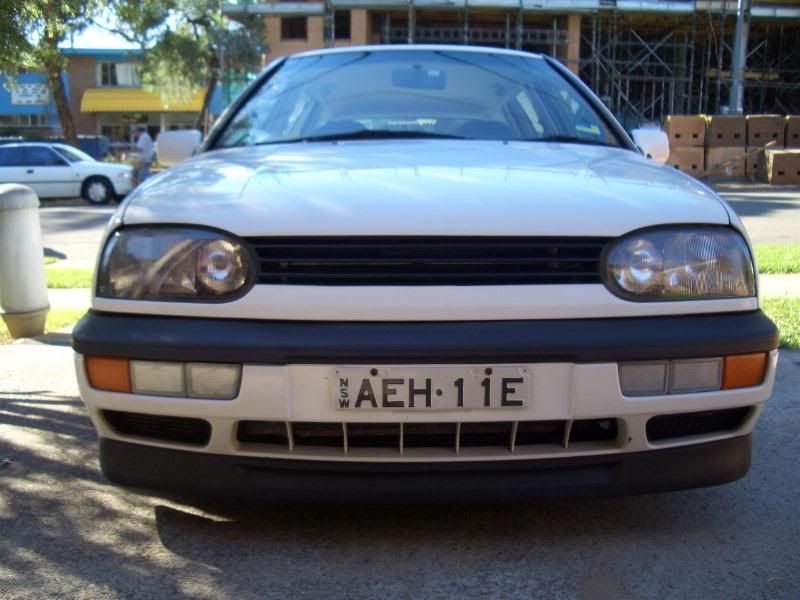
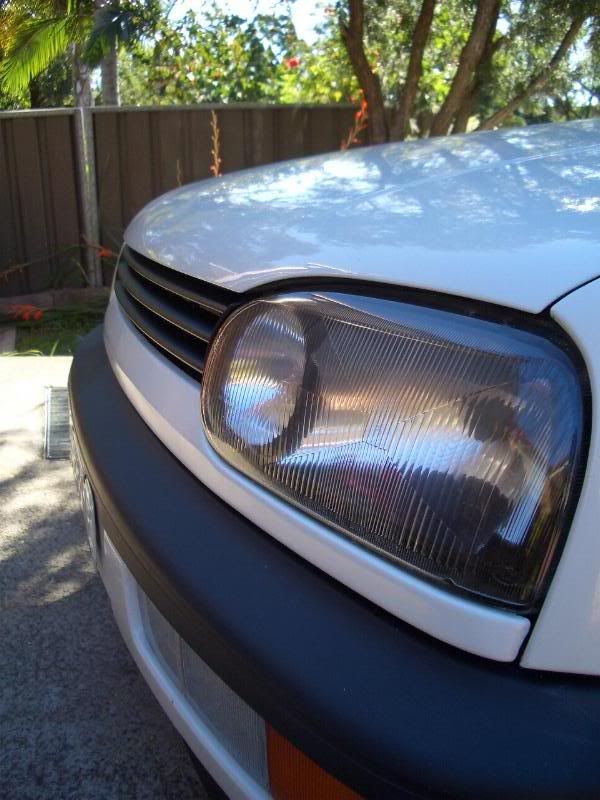
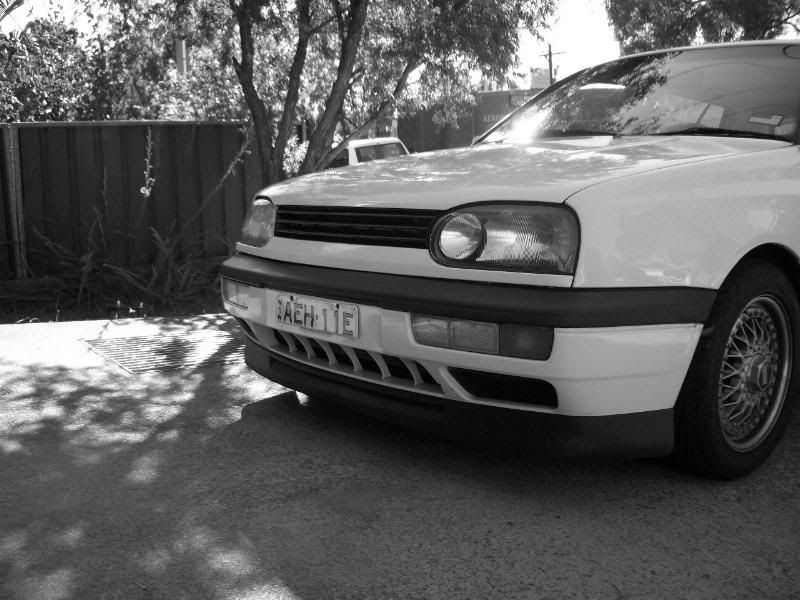
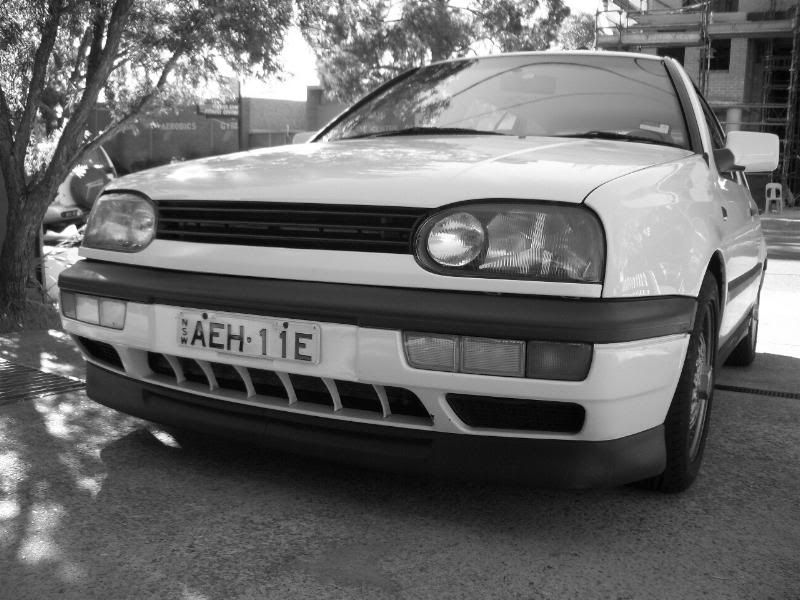
Mk3Love

Thanks for dropping by my blog.

Just thought I chuck in a link here for those that love what my Golf is about, and why I'm so obsessively into it.


Showing posts with label DIY. Show all posts

Monday, 7 January 2008

DIY: Headlight refurbish

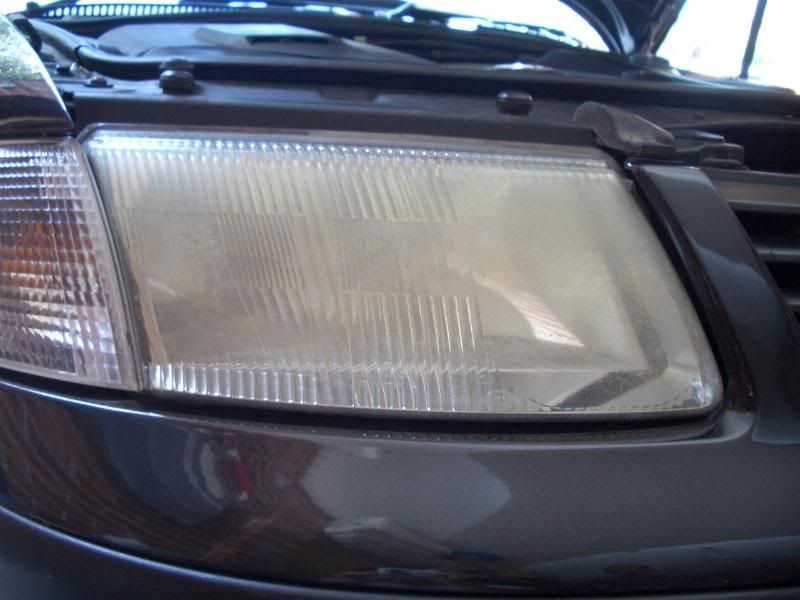
It is a common problem with a lot of car headlights that they start to turn cloudy and yellow over time. This is a result of all that mother nature throws at the headlights as you drive through rain, dirt, sunny day etc. Fortunately there's a way to bring the headlights back to its former glory! This DIY is for the most part an adaptation to the one written by FaelinGL on VWVortex. He made an excellent DIY.

Materials:
  • Water bottle w/ detergent+water mix
  • Masking tape
  • Bucket with clean water
  • Waterproof sandpaper (400/600/1000/2000)
  • Terry cloths/polishing cloths/applicator pads/rags
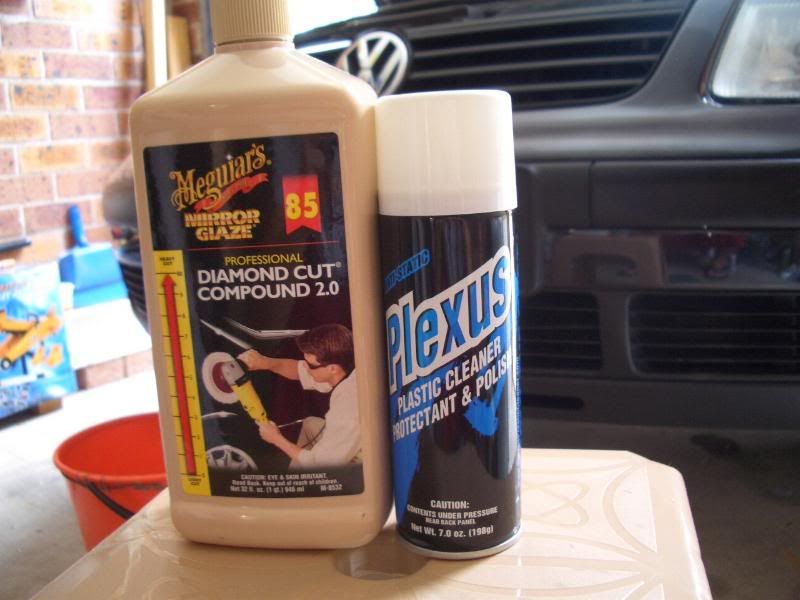
  • Rubbing compound (I used Meguiars Diamond Cut Compound)
  • Plastic polishing compound (I used Plexus Plastic Cleaner: Protectant & Polish)
  • Torch
Products:
  • Meguiars Diamond Cut Compound (MDCC) & Plexus Plastic Cleaner (PPC).

    For this application, I thought MDCC was not heavy enough. I applied it about three times after the sanding and the result was far from what I hoped for. This may be due to bad sanding procedure though...
    The PPC was a bit awkward and different to use. I was expecting it to be a substance similar to all the other polishing compounds I've come across, but this one was a spray in an aerosol can. It did next to nothing after the MDCC, though the sales assistants that helped me out said they had lots of good feedback for that product. I reckon the Meguiars PlastX as used by FaelinGL would have been a better alternative.
Procedure:
  1. First off, make sure you're working under shelter and that the paintwork is not hot to touch.

  2. Mask off surrounding paintwork as to avoid any accidental scratches. I just used newspaper but it was a pain to work around.

  3. Spray (liberally) the detergent water mixture on the headlights, and proceed to sand using 400 grit waterproof sandpaper. Sand in one plane (e.g. left-right), maintaining the same amount of force throughout the surface. Continually wet the surface; use a rag to wipe off any particles. About every 5-10 minutes, wash the surface with water and wipe dry - run your fingers over the surface. If the surface texture is inconsistent, keep sanding. Proceed on to the next (finer) sandpaper when the texture of the whole headlight feels the same.

  4. Repeat step 3 with the finer sandpaper, except sand in a different plane (e.g. up-down). Every time you check for surface texture consistency, you can check the direction of the scratches on the headlights. Use a torch if visibility isn't that great. Keep sanding until all the scratches are in the new plane. Repeat this until you finish sanding with 2000 grit (yeah it's bloody annoying, but you won't get perfect results otherwise).

  5. Clean with water only and wipe dry. Now, we apply the rubbing compound. Just like a car polish, work the compound into the headlights and buff off completely when it dries. Best to follow the instructions on the compound you bought. Repeat as many times as needed (three is usually enough).

  6. Similarly, apply the plastic polish.

  7. Buff out any residual polish on headlight and paintwork. Remove masking slowly and (hopefully) marvel at your work!
Results:
  • Before:

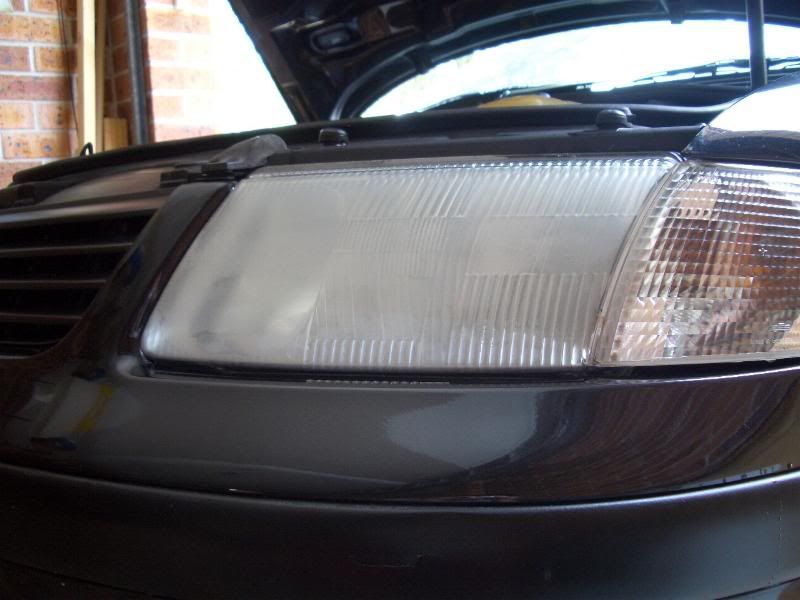
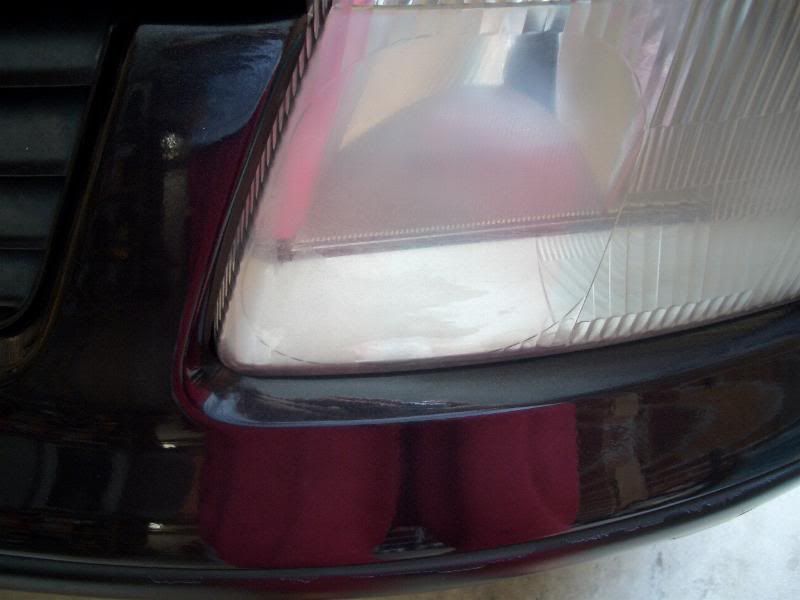
    After sanding (notice that the yellow tinge is gone):

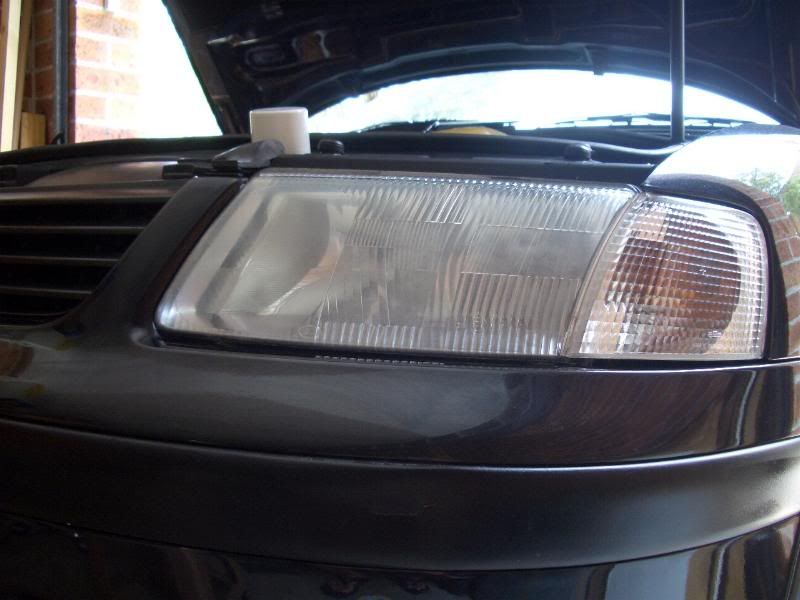
    After polishes (haze gone):

  • Imperfections:

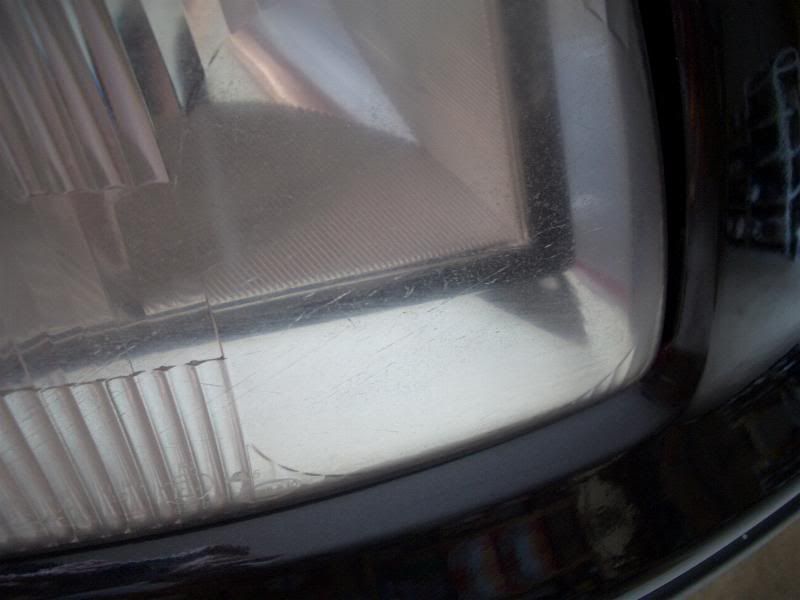
    These were only apparent after the polishing work. In the first pic, you can still see bits where the haze is still present. The rest of the headlight was still not clear enough to my liking, though it was far better than what we started off with. In the second, the deeper scratches weren't sanded/polished out well enough.

    I did this DIY with 600 and 1200 grit sandpaper, and went through it all rather quickly. 600 grit just wasn't rough enough to sand away the haze quick enough, so I reckon starting off with 400 would be best. Working through more sandpaper grades would be easier when it comes to sanding out scratches.

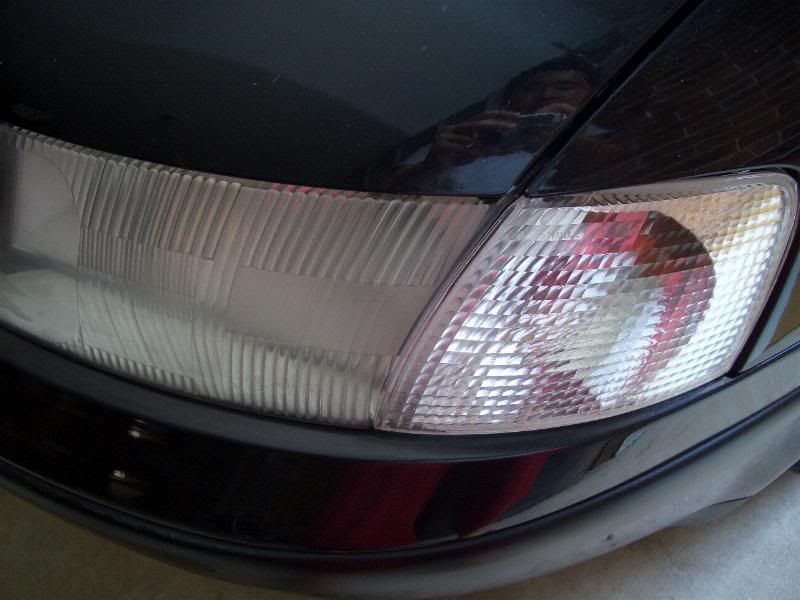
    Just a comparison with the indicator lens:

    It's nowhere near as clear, but I reckon when done right, it can get very, very close.
Maybe not a problem with the Mk3 (I've never seen an example of this on a Mk3), but this can be carried out whatever the condition the headlight lens is in.

Sunday, 28 October 2007

DIY: Fender rolling for Mk3 vehicles.

More of a fender rolling prep than the actual process, but here it is nonetheless.

Aim:
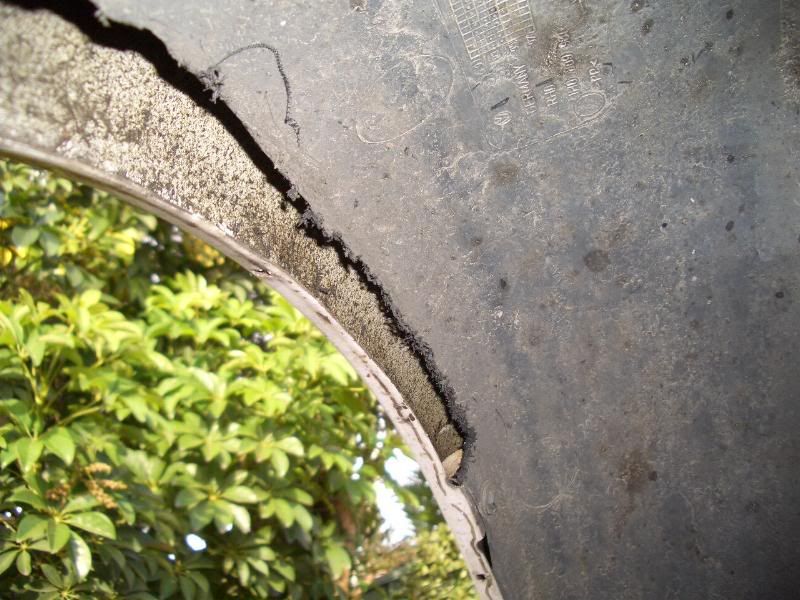
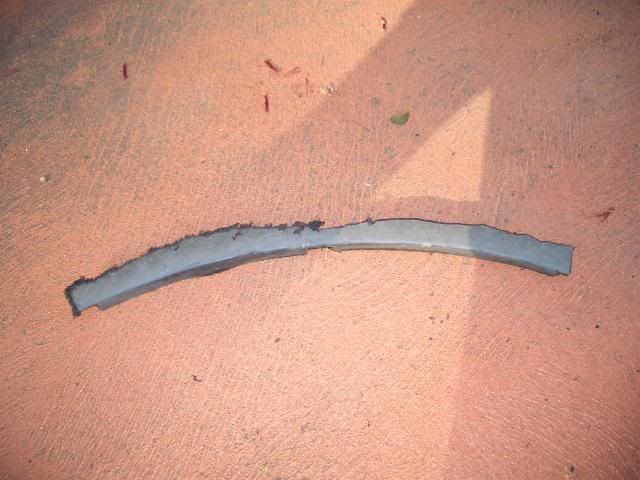
  • To remove sections of the front guard liner under the fenders in preparation for fender rolling.
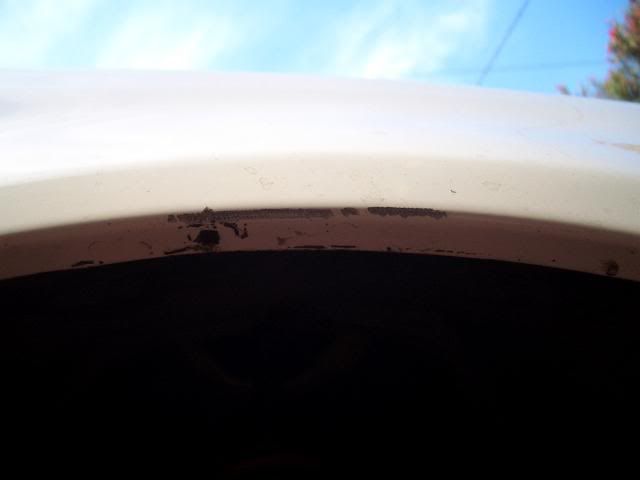
  • Fender rolling involves folding the lip of the fender, effectively allowing more room for a wheel to fit under.
Materials:
  • Dremel (with a cutter bit)
  • Marker
  • Heat gun
  • Fender roller equipment
Safety:
  • WORK ON LEVEL GROUND. Don't make things difficult for yourself.
  • Use a hydraulic jack, or a scissor-type if you don't have one. Don't risk using the widow-maker.
  • Use STANDS. Don't work under a car with just a jack supporting it. You might think it's unlikely, but they can fail, and when they do, you'll be FUBAR'ed.
  • Chock the wheels so there's no room for your vehicle to move. Cars are known to roll off jacks or stands in unusual circumstances and this will also get your FUBAR'ed if you're working under the car. There's a very high chance of this happening if you don't heed the first safety point.
  • Wear gloves, face protection, ear muffs and work under shelter. You'll be working with a dremel up close and there will be falling debris. There's also awesome acoustics under the guards, and you'll find yourself going deaf with your head in there. Also, the sun will affect your vision too. I found out when I started doing this during the afternoon and I had to the car facing west :P
Procedure:
  1. SAFETY! Make sure the hand-brake is on, chock the rear wheels (give just a little room for the car to lift up), loosen the wheel bolts, jack the front-end of the car up, place it on stands, take the wheels off and wear your gear.

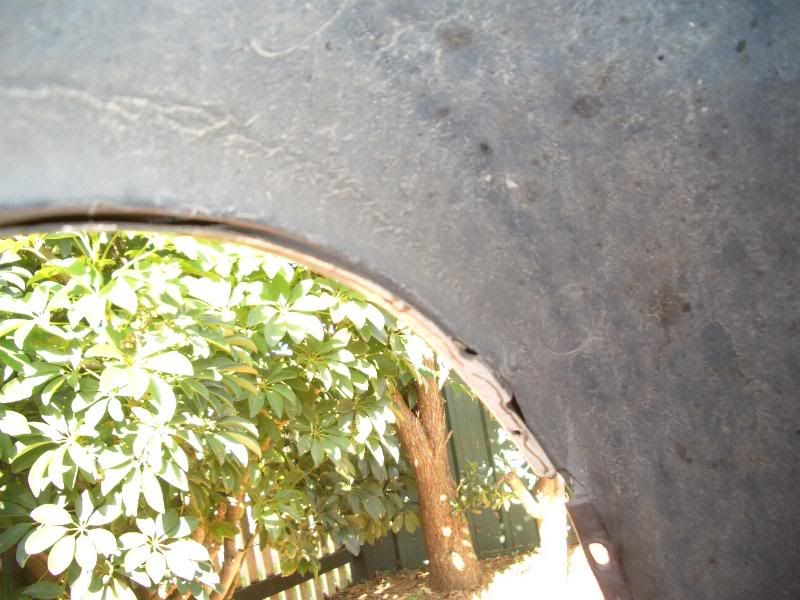
  2. Look under the fender. Along the length of the arch of the fender, you will see four bolts around the edge - one located near the jack sills, one located near the bumper-to-guard bolt, and the other two bolts between these. Let's focus on those two.

    The lip of the guard between these two bolts will usually be the part of the fender that a wide wheel will come in contact with. We won't have to take these bolts out - instead, this is where we will commence our cuts.

  3. Make a marking about 1cm away from the bolt. Cut perpendicular to the lip, making sure you don't come in contact with the metal. Do this for the other bolt.

    There's a slight fold about an inch from the lip - this is where I made the parallel cut from bolt to bolt.

    My cutting wasn't very straight but as long as there's enough room for the lip to roll over, you'll be fine.

  4. Repeat for other side.

  5. Follow the instructions of your fender roller and go crazy. Remember to use a heat gun to warm the panel first before doing any rolling.
Notes:
  • The DIY is only applicable for the front two fenders - the rears don't have a guard liner.
  • Before rolling both front and rear fenders, remember to clean the inside of the lip thoroughly so there's no debris - anything residing in there can lead to a thicker fold, or worse yet, dents on your panels.
  • Use the dremel slowly and carefully. I inadvertently hit the paintwork of my fenders.

    Don't say I didn't warn you :(
Today I'm getting them rolled. Will show final pics when I get them.

Friday, 4 May 2007

DIY: Badgeless grille [Part 2]

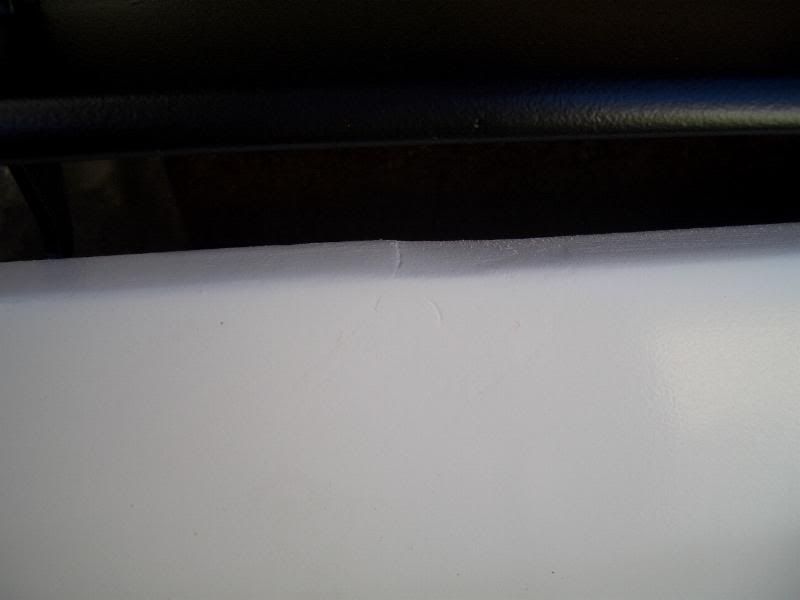
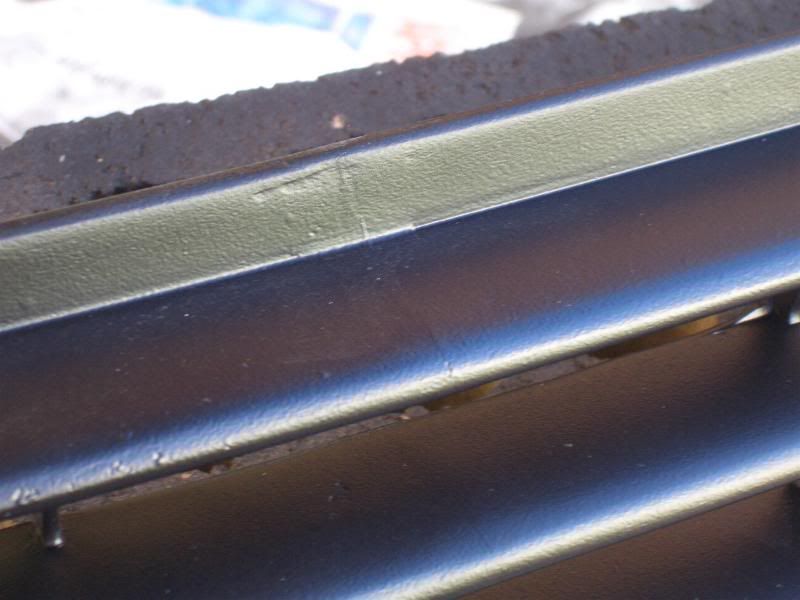
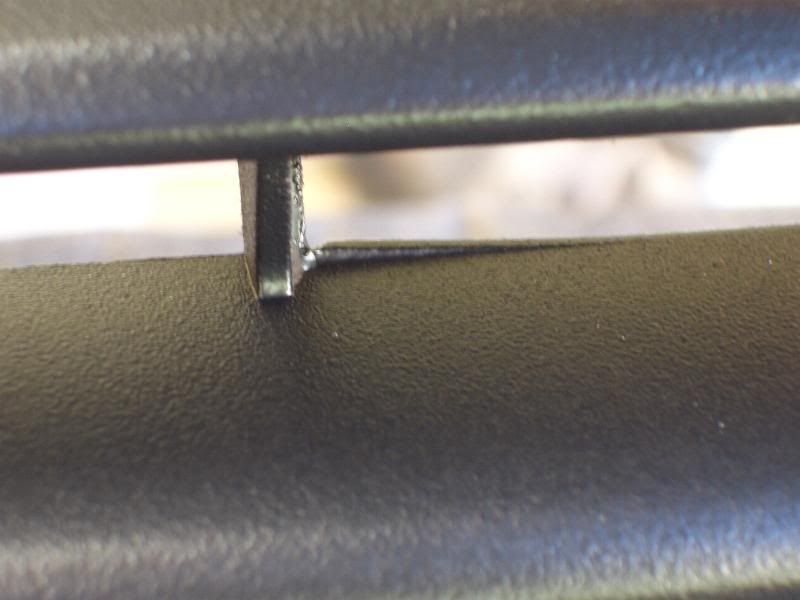
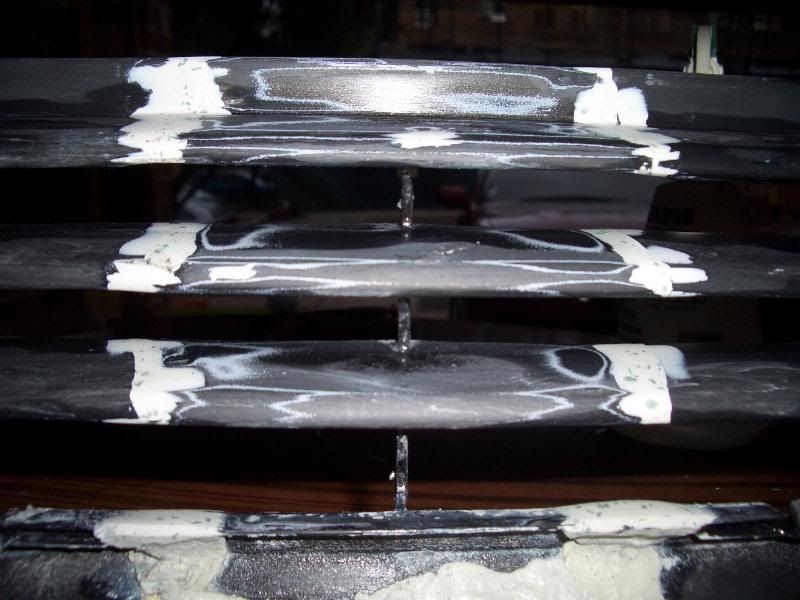
This DIY blog article may not make much sense without the first part of it. Part 2 of the DIY consist of tips/improvements, close-up pictures of the imperfections, and the final pictures of the grille on the car.

Tips/improvements:
  1. N/A

    • When sanding the cavity of the lower grille back to bare metal, use the disc sander on the dremel - however, be careful not to sand too much. As soon as you see bare metal, move on to the next spot. Do not apply a lot of force - just skim the surface just enough to sand things off. It's just very easy to drop the Dremel and let it do the work, so try and use it gracefully!
    • Keep in mind that the epoxy bonds best with bare materials (metal/plastic). It is not as effective against paint or clearcoats.

    • Make sure you cut out a larger section, as you can always sand it down to make it fit later on.

    • I guess my only tip here is take lots of time. Make small adjustments until it fits perfect. If that means 100 trial fits, then so be it. More, small adjustments will get a better result as opposed to fewer, but larger adjustments.

    • An extra person to help out with the alignment would be great, but if no one's available, masking tape should suffice while you do one side first.
    • Make sure the epoxy is spread over most of the bare metal to increase the strength of the bond (well, that's what I think anyway). Frequently check the alignment as it's very important it sits perfect with the rest of the grille. A slight misalignment here and there will lead to frustratingly big sanding problems later and the final product will most likely come out shit.
    • If you feel the epoxy is starting to harden and you still need to work it around a bit more, take it all out and throw it away. The epoxy hardening is a sign that it's bonding, and if you're just starting to apply it when it's nearly hard, it will not bond as strongly. This is very important, as the joints may show up some cracks in the final product due to insufficient time to bond - this is exactly what happened to mine on the top slats.
    • Do little sections at a time. It will help greatly in the alignment. When I mention little sections, I mean both the front side AND the back of the same section. I think it may bond stronger if the consistency/time of hardening is employed in the same sections - that said, having the section aligned is much more important IMO, so decide a little compromise for yourself. This DIY is easy to do, but extremely hard to get right.
    • The bonding does not have to look pretty; you will be sanding it down anyway. However, DO make sure the bond covers most of the bare metal part.
    • Instructions say to leave the epoxy bond to do its job overnight. I left it for nearly a week; I like to think it holds stronger for longer if I do that. It's probably just a placebo effect, but I left it alone for that long anyway, as I went on to do other parts of the DIY while I let it stand.

    • I found it easier to cut if I just marked the section in a rectangular manner, as opposed to cutting it right on the edges of the circle. In retrospect, both methods wouldn't end up being harder to do than the other throughout the whole job.
    • I found it really hard to use a grinding disc on the Dremel to cut the plastic slats, so I ended up putting a drill bit on the end of it and slicing it side on. It doesn't matter if the lines are straight or not either, though it would make things easier if they were.

    • The dimensions don't have to be accurate - as long as they're long enough to allow for adjustments to get the centering right.
    • Again, it doesn't matter if the cut-out is not straight - as long as it's done with enough length to allow for adjustments.

    • Remember step 4?
    • Regarding the sanding to bare plastic - you won't need as much surface (compared with the metal grille) as the overall area is smaller and it will be more beneficial to use just enough epoxy as sanding it down later on becomes a bit of a nightmare.
    • Don't worry about getting any previous paint completely off - as long as its roughed up, it should be fine.

    • Similarly to step 5, work the epoxy before it hardens. Basically, just follow the same instructions as in step 5, except you would need to take even MORE care in handling the epoxy and also in the aligning. This step is so much more harder to get right than doing the lower grille, mainly because we're working on a much more defined and smaller area, and it's on plastic. By the way, to make sanding easier later, make sure the edges of the epoxy bond are smoothed out - use a bit of water on your fingertips and flatten/smooth out the edges.
    • It's better to do the bottom section first; this part is easy to do and just requires proper alignment. Take into consideration the alignment of the slats as well, cos once fixed, there won't be much room for the slats to be 'adjusted' so get them each aligned properly when bonding.
    • Checking out the grille from different positions and angles helps a lot in your perception of the alignment. If you have the patience, once you got it aligned, hold it there for 15 minutes, checking the alignment on it every minute or so. Remember, it is VERY important that they are aligned properly, as there's simply not enough plastic in the slats to allow you to fix up misalignments. Get it as straight as possible, and make sure the slats flow at every angle you can see. If you can't get it right, take the bond out before it completely hardens and re-do it.

    • Regarding the wet-sanding step - I failed to do this, and only discovered the miracles of wet-sanding when I was going for an even finish on the paint job. I was too late then, and I couldn't be bothered re-doing the sanding after so many layers of paint :( Though I wish I did.
    • Anyway, spend plenty of time wet-sanding. Try and apply even pressure as you're trying to achieve an ultra smooth, super level surface. Have a thin sandwich plastic bag handy - use it to "see" any uneven-ness on the surface by feel. Progress on to the next grit when the sand markings of the previous grit are totally gone. You can easily tell this by changing direction every time you change sandpaper grit. Putty/bond over cavities that present themselves. A thin layer is all that is needed, as you don't your surface to be overly 'bumpy'. Once you 400 grit (or similar) sandpaper, wetsand the entire surface in prepation for paint. Leave your final grit to be about 600-800, as the surface requires some roughness for the paint to adhere to.

    • I went crazy with the coats of paint as I wanted to try and disguise the markings. It nearly worked - the more layers I put on, the more masked it became.
    • The wet-sanding helped disguise the marking even greater and I was quite happy with the result. A step that shouldn't be skipped!
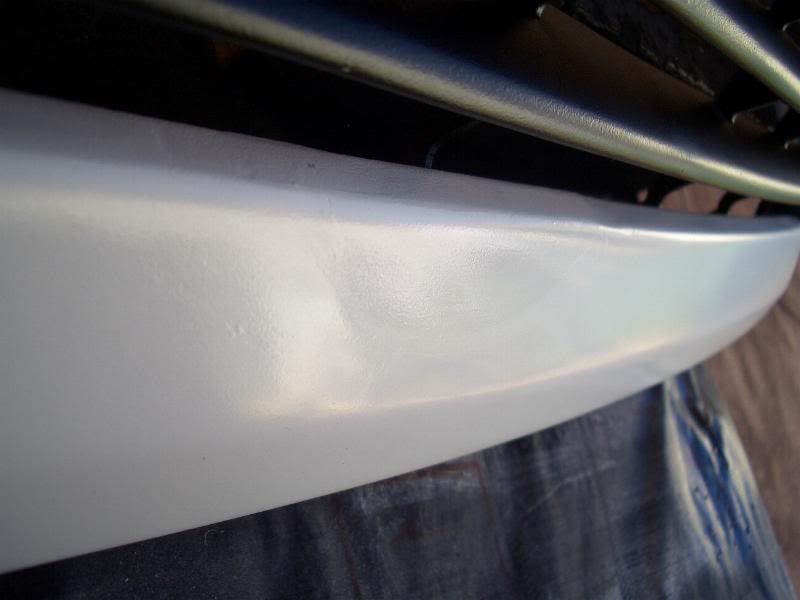
    • Again, copious amounts were used for the clear-coating - I think I put on at least 4 layers. This gave it a more glossy feel to it, and the white now gave off a bit of a shine. Clear-coat, in my visual judgement, emphasised the marking a bit more, though it made the paint look better. At most angles, the marking cannot be seen, but at certain angles reflecting off the light, you can see a colour change. I don't know what causes this, but it's quite apparent in the picture just below.


    • I found that it was generally easier if I used the same grit on ALL the bonded parts first, and then progress on to another grit. Also, use the plastic bag trick to check for levelness; fix accordingly.
    • Similarly to aligning the slats together for epoxy bonding, make sure you check every angle of the slats, visually evaluating the levelness. Smooth over when necessary.
    • Don't go apeshit on the sanding - be gentle. Remember that the plastic slats are thin, and any sizeable force can break the bonded parts. It's better to take your time sanding than trying to hurry it. I'm said it billions of times, but it's crazy how there's such an overwhelming feeling of trying to get it over and done with ASAP.
    • While wet-sanding, continually spray the surface free of dust-sand particles with water, and also spray the particles on the sand paper off. I was able to use the same 120 grit sandpaper again and again this way.
    • Keep a towel or rag handy to wipe away any dirt and water on the slats - it's good to inspect it and see how you're going with it, along with 'feeling' your progress too

    • With the primer, it's best to make multiple ultra-light coats with enough time between each coat to dry. I sprayed a heavy coat at once, and I ended up accumulating a reservoir of primer at one end of the grille as they're quite runny. Needless to say, I've got a patch of thick primer on one corner of the grille, but it's not really that noticeable.
    • Now, I was originally going for the colour-coded option, but knowing how impossibly difficult it is to get it looking perfect, I decided at the last minute to get it that black-textured look instead. That way, the imperfections aren't as easily seen.
    • Multiple layers help cover up very minute imperfections. After about 4 layers, I called it a day and left it to stand overnight. I sprayed another 4 the next day. The grille was a very rich black.
    • I had lots of different shades of black when I started this. I had matte black from way back when I did the Joey-mod; I had the plastic and bumper black from which I sprayed the sideskirts with (bought from Autobarn - great nozzle to use, but shit paint), and Pedro's plastic and bumper black from Septone. Now, the Autobarn paint was easy to use and a breeze to apply, but came out shit. Pedro's paint was annoying to use (paint didn't come out evenly at different angles, even though there was quite a bit left in it) and also dull to look at, but the matte black looked great with a fine, even finish. However I only had a little left. What I ended up doing was using all three different paints - the Septone and Autobarn one was mainly used as the bottom layers, while I finished off with the matte black.
    • While you can't generally see the underside, it doesn't hurt to cover up the bonded area to get a more clean finish.
    • Since the wet-sanding worked sooooooo great for me in the previous steps, I decided to do it before I cleared. Bad decision - the paint was pale after that. But no biggie - put another coat of matte black and it was looking tip top again. Then I cleared. And cleared. And cleared. And cleared. I still loved wet-sanding, so I did it. And it paled AGAIN! At this point I just couldn't be f*cked anymore, so I just put a layer of matte black over the clear, and now it looks good. Very texture-like. Don't know how long that'll last, but I'll take my chances. Anyway, the moral is, don't wetsand here! I don't know why it pales so I can't explain why it does that.

    • Before I started this DIY, the passenger side of the grille was always sticking out, as if it didn't fit on properly. I've now rectified the problem by bending it back a little, and it looks as new with the tighter fitment.
Imperfections:

  • Slightly different shade of white between the pieces

  • Misalignment problem on one side of the lower metal part

  • Top slat cracks

  • Small cavity that I didn't notice until the layer of paint went on

  • Remnants of what was left from the cut out in step 6 - I didn't want to risk over-sanding so I just sanded as much as I could by hand. Hardly noticeable.

Final pics:


All the pics to do with this DIY are in my Photobucket.

Over and out.

Thursday, 3 May 2007

DIY: Badgeless grille [Part 1]

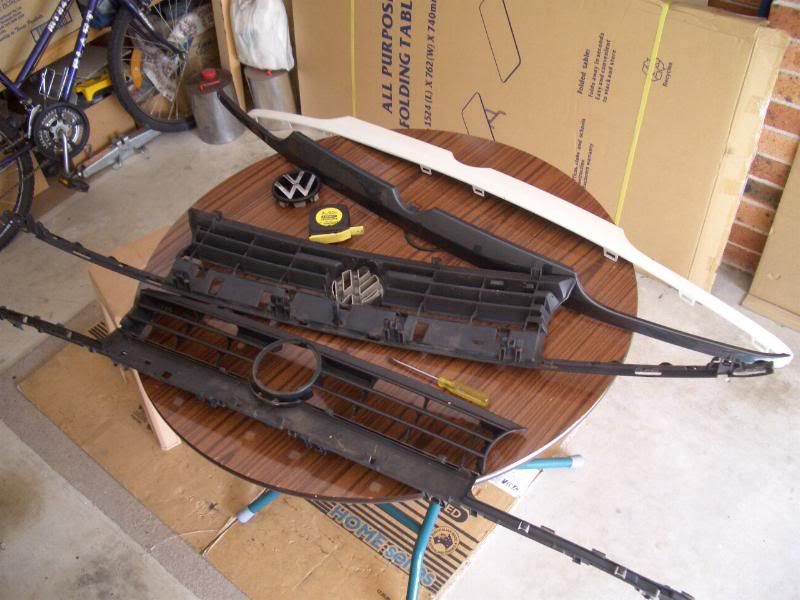
Remember my 'Getting ridiculous ideas' blog? Well, I've finally completed one of them, the badgeless grille. Turned out pretty good, though my handy work is not perfect. Looks good from afar, but up close, you can still see the lines where I made the cut-outs.. Just. ;) Slapped it onto the car, and it fits perfect and looks almost perfect :) Anyway, on with the DIY - here's the gallery of pics on my Photobucket. Some of it are linked on to here as well.

Materials needed:
  • 2 identical grilles (GL/CL 3-slat, or VR6 2-slat)
  • Plastic welder or multi-purpose epoxy (I used the latter; make sure it adheres to ABS plastic)
  • Welder or metal epoxy (I used the latter)
  • Measuring device (if you want good results)
  • Permanent marker
  • Cutter (I used a Dremel)
  • Wax and grease (w&v) remover
  • Sand paper (I used coarse (80/120/180), intermediate (240/400), and fine (600/800/1200) grit)
  • Water bottle with spray
  • Masking tape
  • Plastic/etch primer (for slats/lower grille cover)
  • Paint (either satin/bumper black for textured look, or colour-matched)
  • Clear coat (depending on paint finish)
  • Paint thinner (to achieve even finishes)
  • Dremel (not necessary, but makes the job a whole lot easier for sanding in between the slats)
  • Safety equipment (goggles, gloves, face mask, covered clothing etc.)
Products used:
Safety precautions:
  • Protective clothing: It is best to wear closed shoes, pants and a long sleeve top to cover the majority of your body. You won't know what will go astray and come in contact with your skin that shouldn't be.
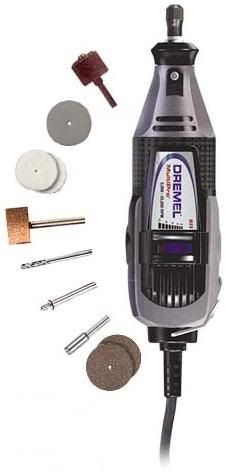
  • Using the dremel: The dremel is such a great tool - there's so many different uses of it with the different adapters and all. It can function as a grinder/cutter, sander and drill. These things can make short work of metal, so I hate to see what it can do to fingers. Wear protective gloves while working with the Dremel. Wear goggles and a face mask to, well, protect your face, and stop you from inhaling harmful particles. I've had sand dust spray all over the place, grinding discs breaking and throwing debris at great speeds (check out one of the pics in my Photobucket; I've had several grinding discs break on me, propelling the broken grinder bits all over the place - lucky none of it hit me), and the Dremel jutting out of place while operating it at nearly full speed.
  • Sanding: It's always an arduous task. No one likes sanding. Coincidentally, it's also probably the most time-consuming step of this DIY. As such, remember to take rests at regular intervals. Have a beer, watch TV, have a drive, whatever. You're not getting paid to do this, just take as long as you want. You are doing this for yourself though, so it's best to have it done properly. A face mask should be used as the sand dust can be irritating for your respiratory system. Goggles aren't necessary, but some of the sand dust can get into your eyes (happened on a few occassions) and can cause discomfort.
  • Painting: Fumes! Wear that face mask, and make sure you're doing it in a well-ventilated area.
Procedure:
  1. First things first! Make sure safety is prioritised as number 1. You will be dealing with toxic/potentially toxic products, using electrical cutting tools and others I haven't listed because I can't think of them. That said, make sure all safety equipment is worn before proceeding each step.

  2. We will start with the lower grille part, which basically acts as a cover along under the headlights and the bottom half of the grille. I will refer to this as the lower grille or the metal grille in this article. The other part (the slats) will be referred to as the upper grille or plastic grille. Just makes it more simpler for me :)
    [I used epoxy bond instead of welding, so my instructions will be based on that]

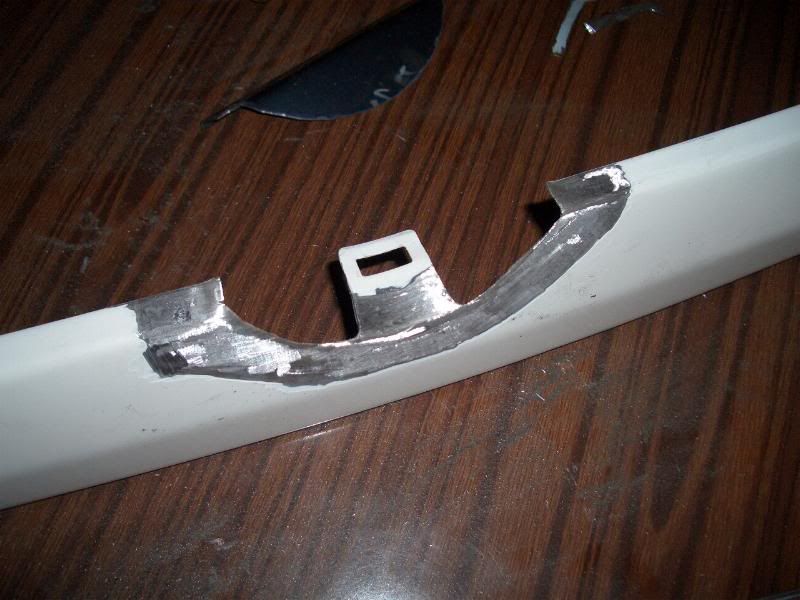
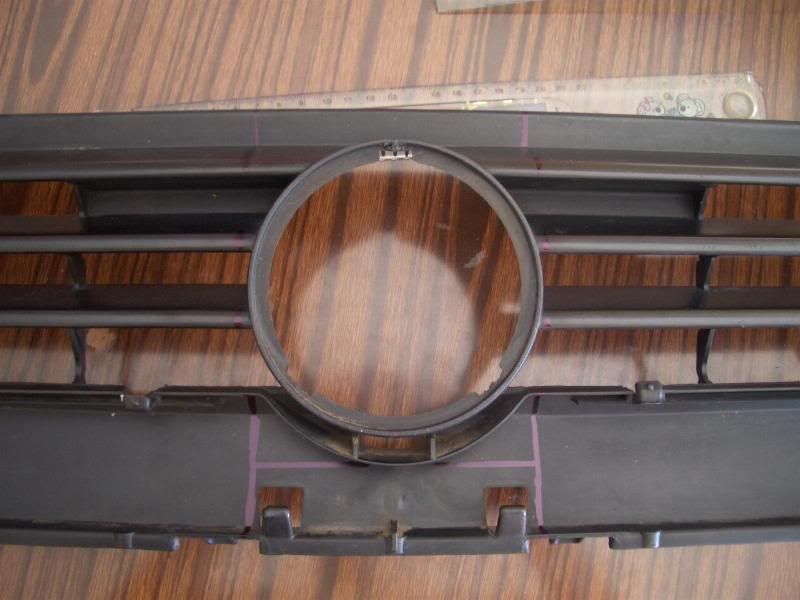
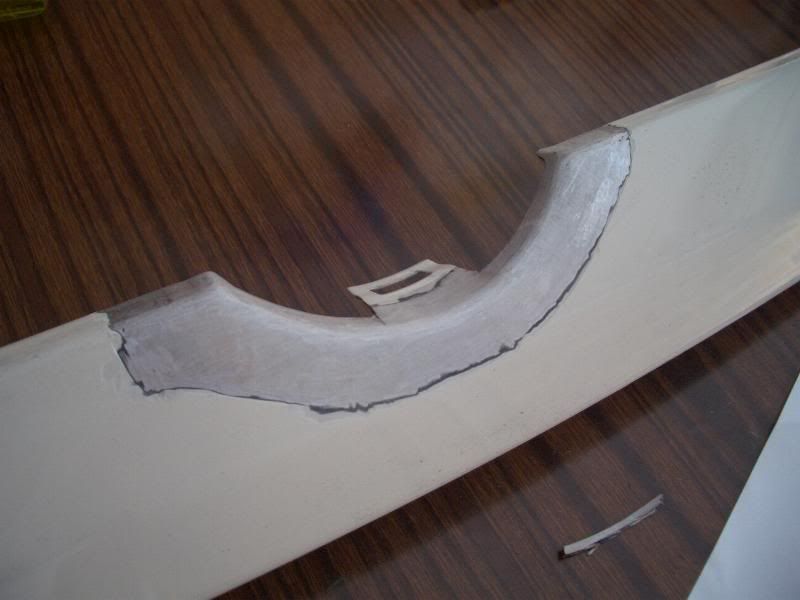
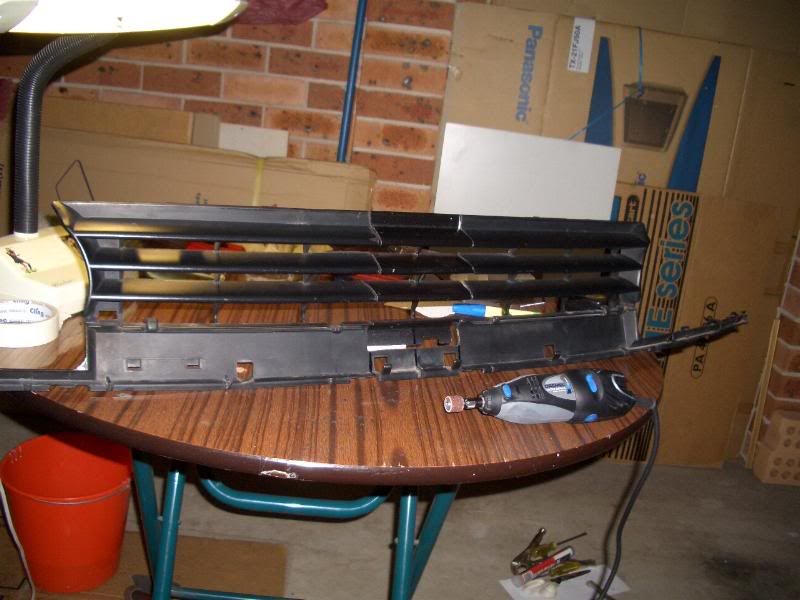
    Cut the side protrusions that are situated horizontally on the top of the lower grille. Cut the tab that slots under the badging of the plastic grille as you won't be needing it - this is not shown in my pics as I thought I could still use it after the job was done. Sand the surrounding cavity where the badge usually sits*. Sand about 3-5 cm out*. Level the area by hand-sanding using intermediate grit.


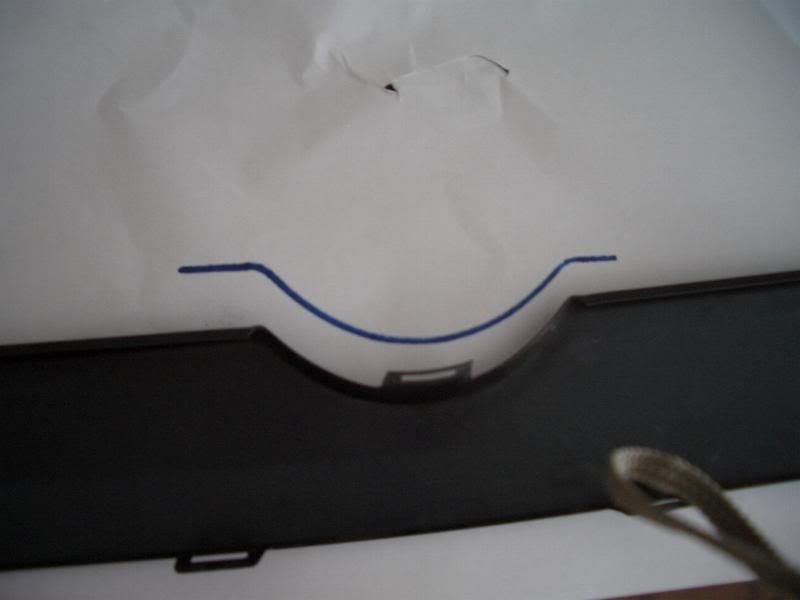
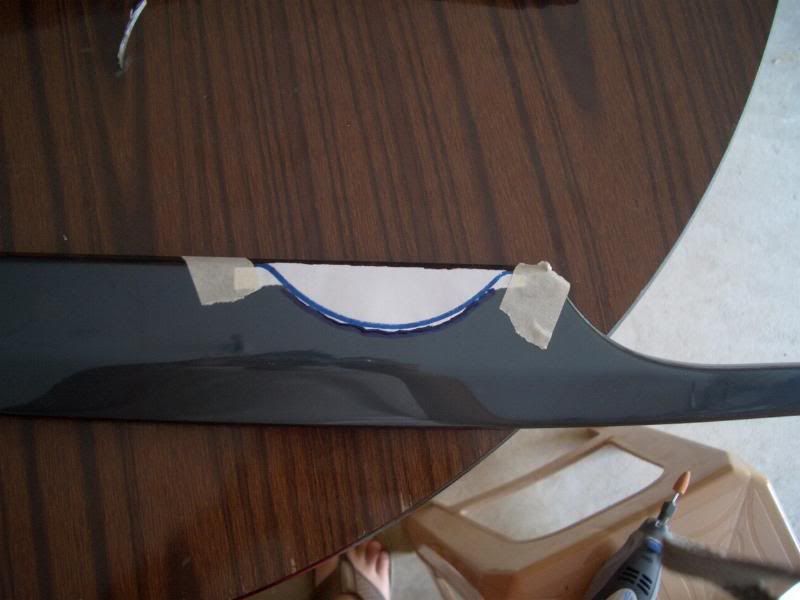
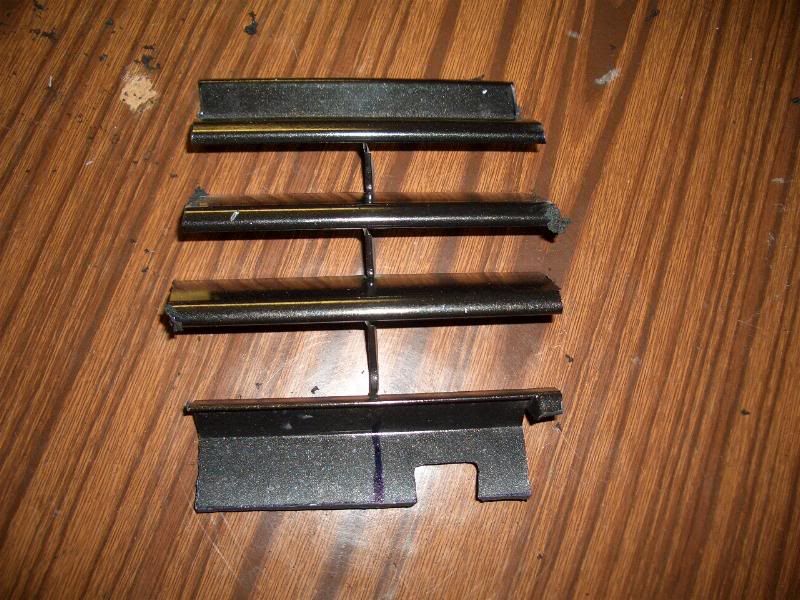
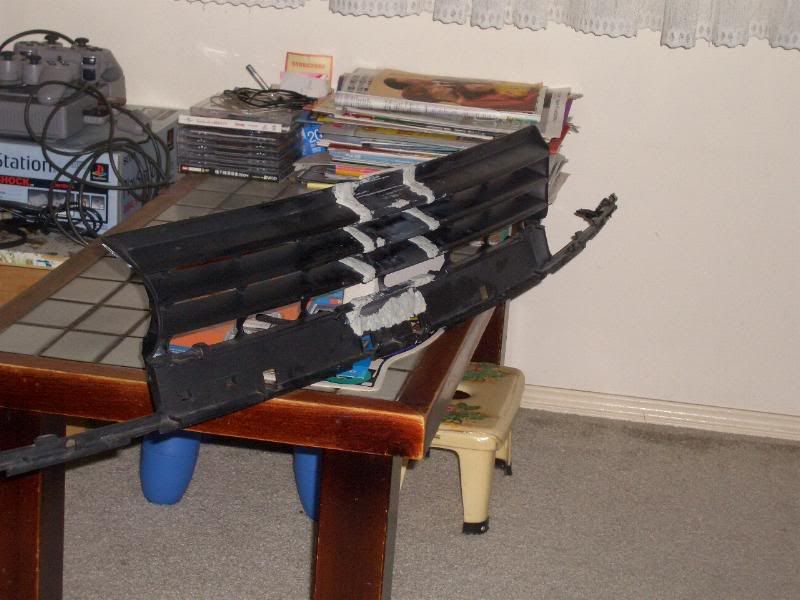
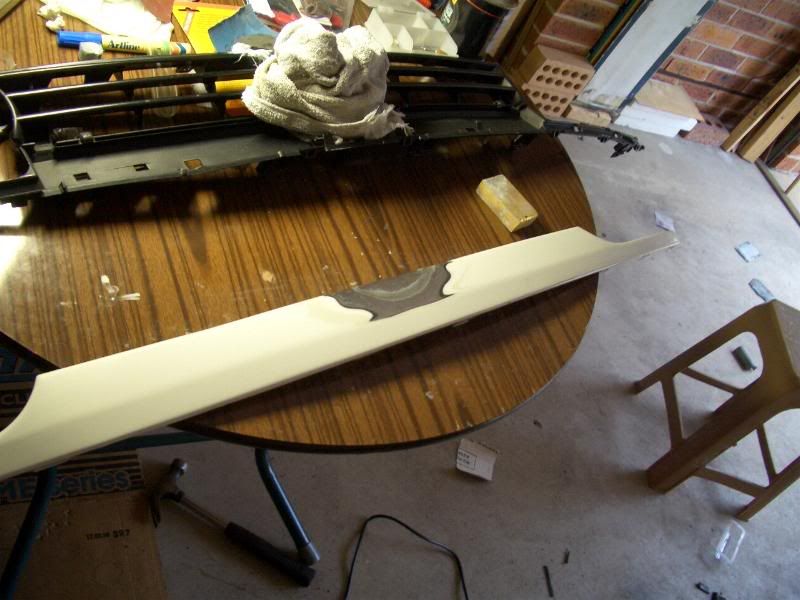
  3. Using the donor grille, mark out (well, trace) the section required to fill the cavity*. Pictures best explain this:


  4. Test fit on the grille. Make the necessary trimming so it fits perfect, with very little gap in between for the epoxy to bridge over (1 mm)*. Sand down the donor piece completely as the epoxy will need to bond to this too. Clean everything with w&g remover making sure there is not a spec of sand dust on it. Ensure the working area is clean too.

  5. Prepare the epoxy (for application on moderate-high temperature metal surfaces) as instructed.

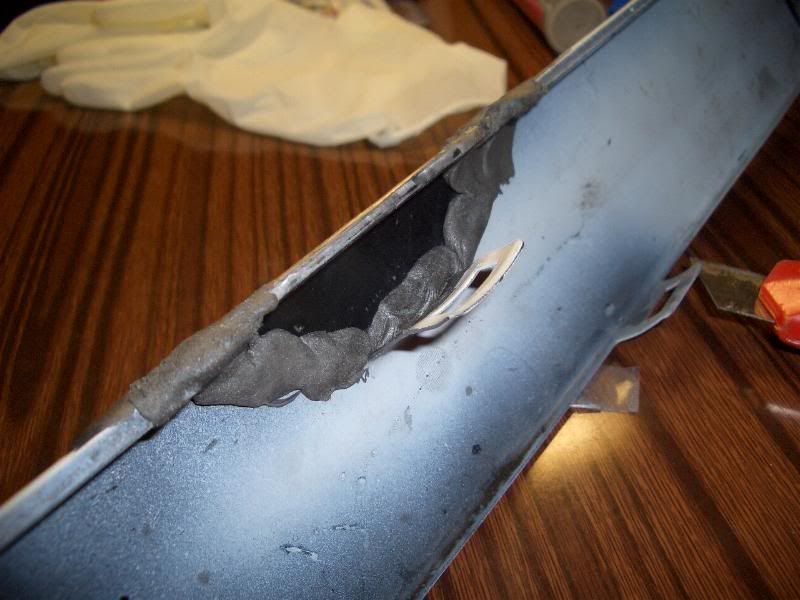
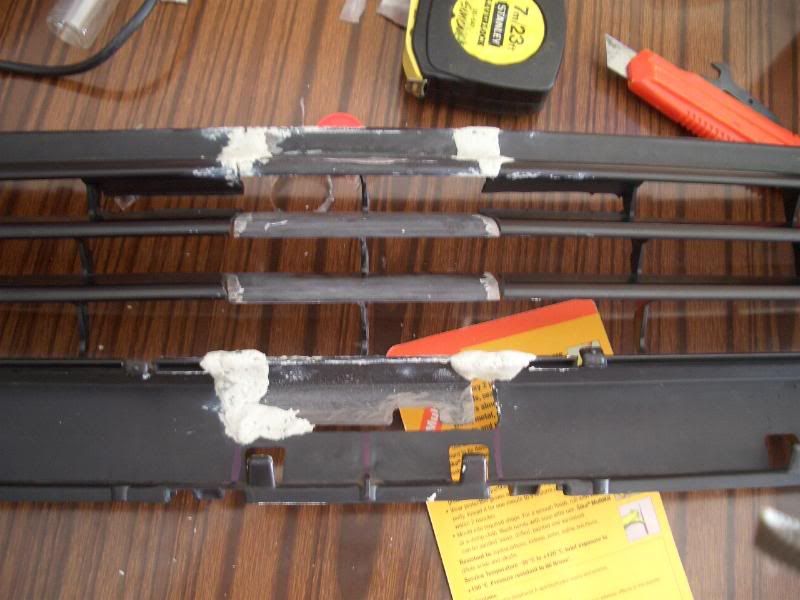
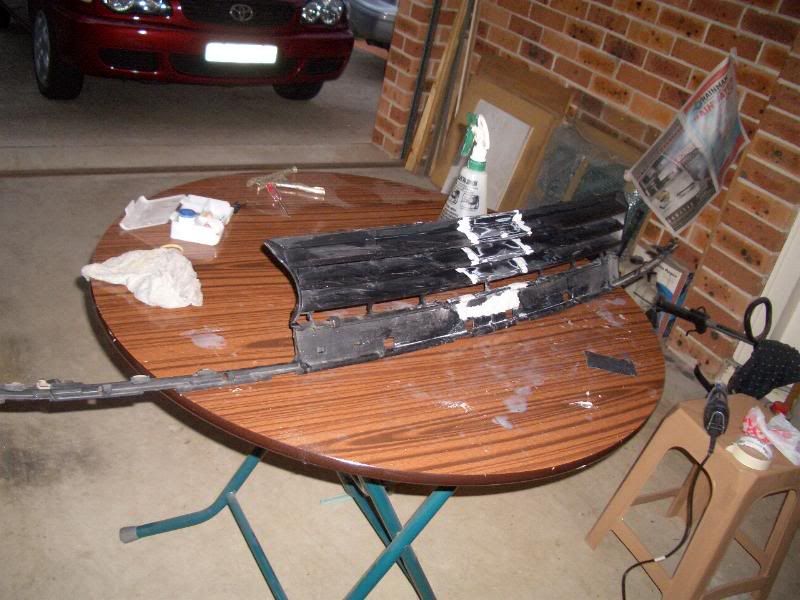
    Align the donor piece so that it sits exactly like the main piece*. Work the epoxy in, applying ample pressure so the epoxy squeezes into the gap*. Remember to also do the back at the same time too*.

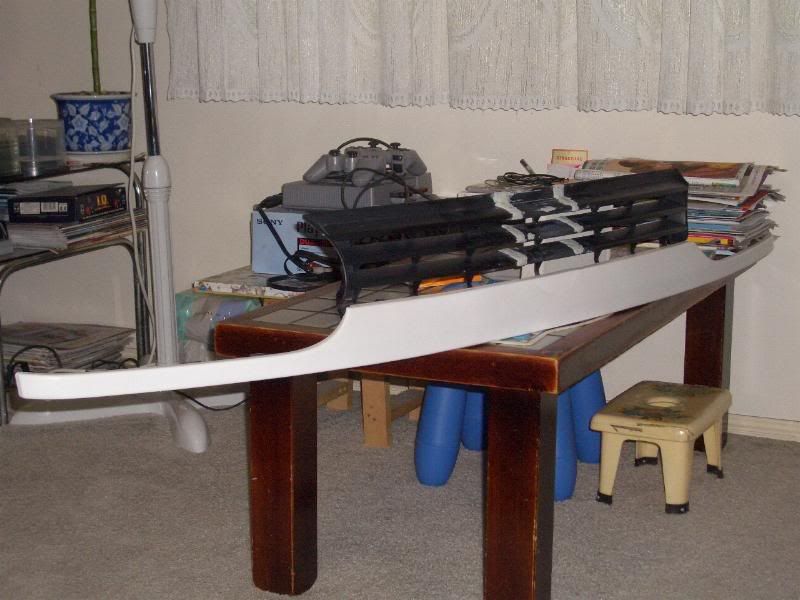
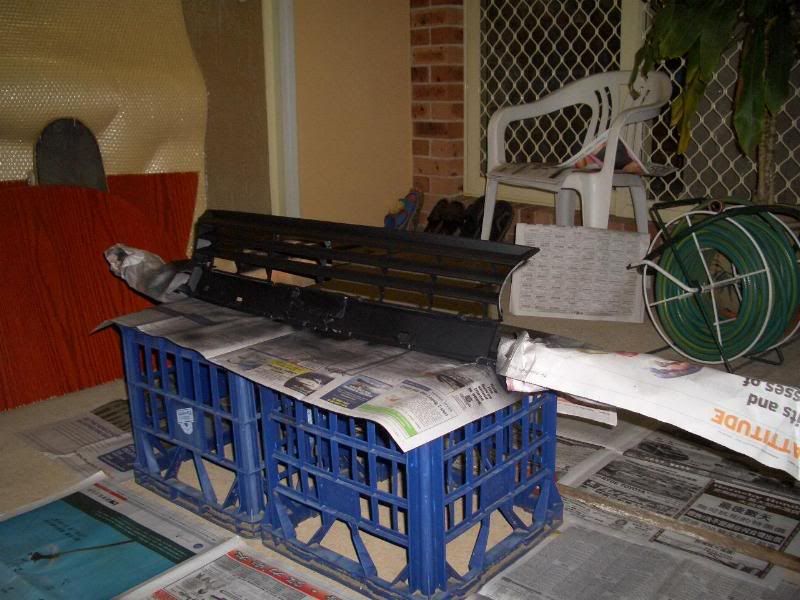
    Once the whole section has been done (i.e. no gaps at all), put aside standing the correct side up (not flat like in the pic below)* and leave for a day.

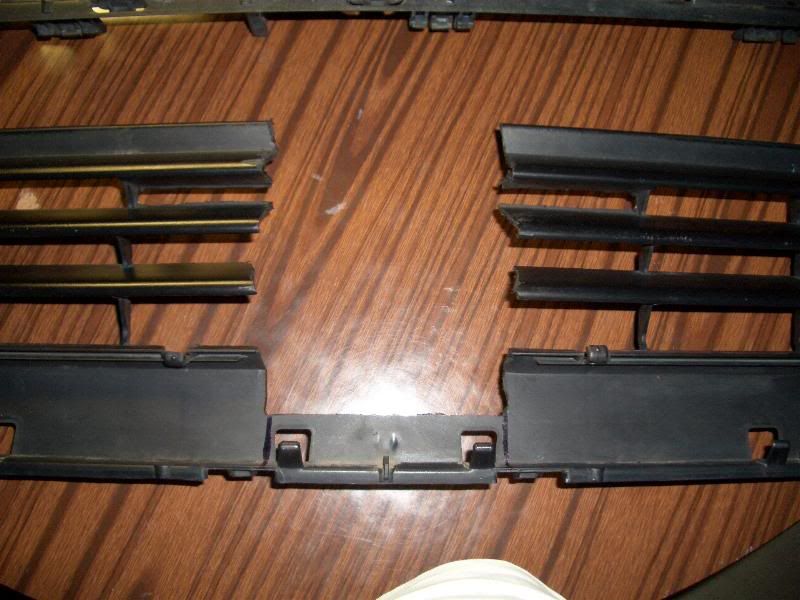
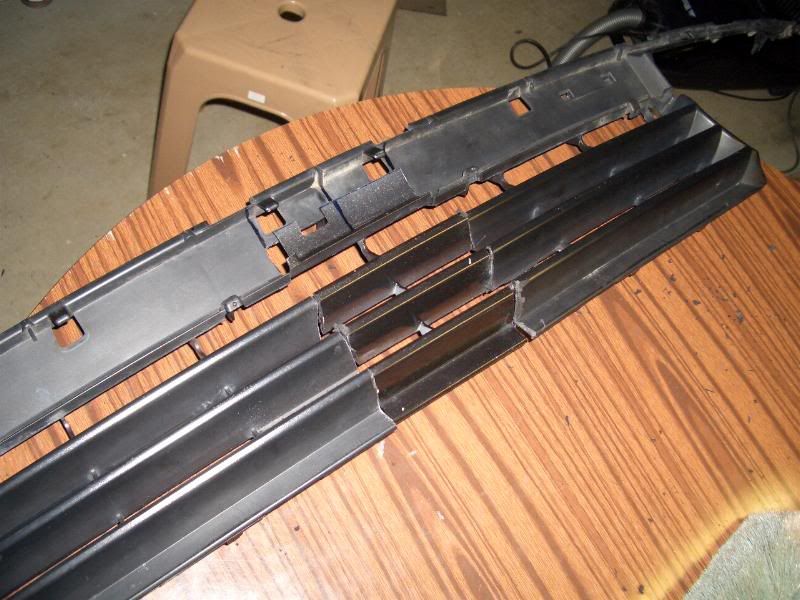
  6. Moving on to the plastic grille. Mark out the circle badged section to be cut, extending down to where the section is completely flat.

    Also, make a marking down the middle of the grille, using the tabs behind and in front of the grille as reference points*.

    Also, try and cut the bottom part of the top slat to reveal an open slot - this can be seen beside the circle badge section on the pic on top of the above. The above pic demonstrates the backing cut out, but not the extension under the top slat. Hard to explain but you'll see it when you're doing this part, and would agree that it doesn't flow.

    Take measurements between each slat to the middle of the grille and the bottom section. Take note as you will be marking these dimensions on the donor grille in the next step.

  7. Mark the dimensions on to the donor grille, ensuring that the centre of it all is exactly where a support stands*.

    Cut it out the same way as done in the previous step*.

  8. Test fit - make sure the supports are directly aligned at the middle marking you made previously. Trim/sand off edges that overlap, ensuring that the maximum gap in between is only about 1 mm*.

    Using coarse sandpaper, rough up the surface around the edges*. If your donor grille was originally painted, roughen up the surface using intermediate sandpaper*.

    Clean the whole grille, and the working area with w&g remover.

  9. Prepare the multipurpose epoxy (i.e. any epoxy that bonds to plastic - ABS specifically) as per instructions while you wait for the grille to air-dry.

    When applying the epoxy*, I recommend doing the bottom section first (the bit that the metal grille covers)*. Pay special attention to aligning these sections. Stand from different distances, look at it from all the different angles*. Adjust accordingly to get it looking as straight as possible.
    Make sure the undersides are thoroughly bonded too. All kinds of support will help, and will lengthen the life of it.
    After that's settled (give it a few hours to harden and be fixed in place), apply epoxy to the top slat. Let it settle overnight before proceeding on to the middle and bottom slat.

    For the middle and bottom slats, apply the epoxy in the same manner as you did for the bottom section and top slat.
    Also, this is your chance to fix stone chips and other imperfections that have made their way on to grill after 10 years of use.

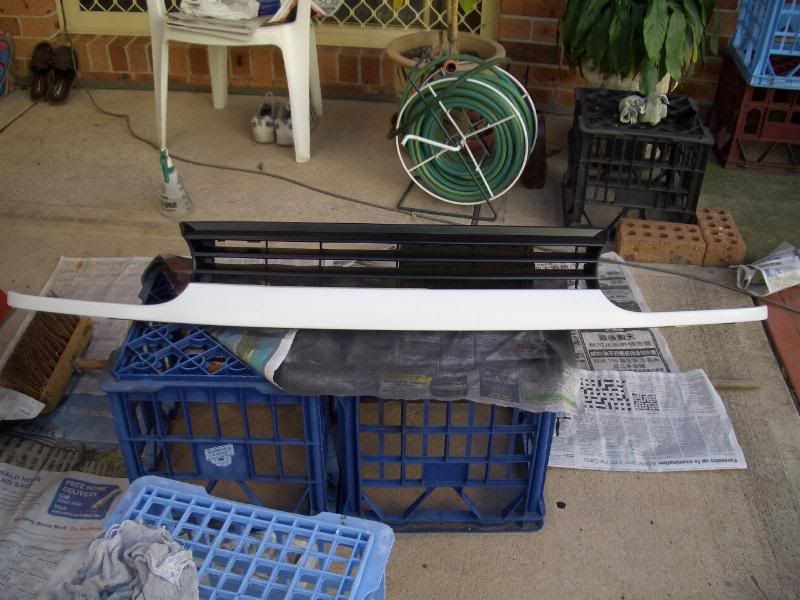
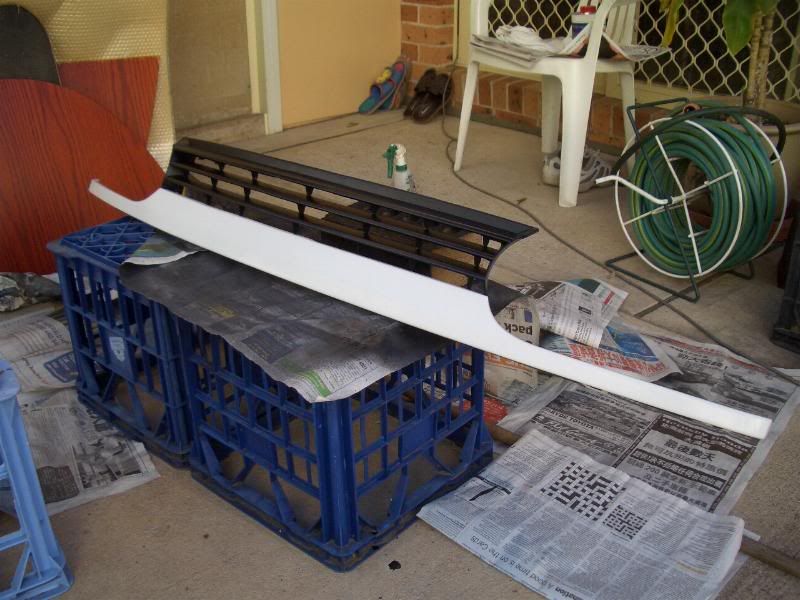
    Once you're totally done with the bonding, set it aside while you move on back to the metal grille. Have the plastic grille sitting upright like in the pics.

  10. Have all grits of sandpaper ready. Starting with the most coarse, sand until you feel that the edges of the epoxy are smooth and the transition from it to the metal are unnoticeable by feel. Using the finer coarse sandpapers, smooth the whole area until it all feels level.
    Start wet-sanding* on the intermediate grits to achieve a smooth, level surface.

    Clean the entire metal grille and work area with w&g remover. Air-dry.

  11. Back to the metal grille. Spray etch primer on to the bare metal parts. Let it dry for about 20-30 minutes, then wet-sand using 1200 grit.
    Spray on as many layers of paint as you want* - keep it to a minimum of 2. Paint thinner was used to try and keep the colour consistency, then a few more coats were put on.

    I finished off with 1200 grit wetsanding* until I achieved a smooth finish.

    Clear-coat* once you're satisfied with the paint. Again, wet-sand at 1200 grit but very lightly, taking off any specks that may have landed onto the surface.
    And here's what made me smile and gave me that proud feeling:

    That was one of my many progress shots! I took so much cos I thought I was going to make some progress blogs, but didnt end up doing so. This job did end up taking about a month only because I took my time and did most of the work on the weekends. Anyway.

  12. Now with the lower grille done, it's time to sand that plastic grille. Depending on the thickness of the epoxy, you can start off with the disc sander on the Dremel. Use this to level out the epoxy slightly, just to make things easier. You have to be very careful not to accidentally go overboard and sand through to the plastic.

    Starting from 120 grit, wet-sand until edges of the epoxy are level with the plastic. Next, level out the bond with 180 grit, wet-sand*. Once entirely done, check for cavities and cracks. Bond over these again using the multipurpose epoxy, but make sure you apply a thin layer. Repeat the sanding steps.
    Keep doing this until it is perfect.

    Once perfect, wet-sand with an intermediate grit sand paper. The goal here is to achieve smoothness - it should be level already, so there's no need to work it hard. There should be very little or no difference with the plastic parts and the epoxy part. However, don't progress on to a fine grit. We still want some roughness for the paint to adhere to.*

    Once you're confident that there are no imperfections and the whole thing is as smooth as a baby's butt, then you're ready to clean the damn thing with w&g remover. Make sure there are no dust particles - actually, anything at all - on the entire surface.


  13. Using plastic primer, prime the whole surface*.
    Immediately after the primer is dry, start spraying a coat of paint*.

    Spray many layers*. Allow time between each layer to dry.
    Make sure you remember to paint the undersides of the slats too*. Basically cover anything that isn't the right colour in paint.

    Apply clear once the last coat of paint has been given ample time to dry. Apply as many coats as you want - it will give it a more glossy look, but more coats will provide better protection. Decide on your own compromise.
    Let to dry, preferably overnight, before you attach the lower grille back on.
    Don't worry about wet-sanding at this step*.

  14. Test fit just the metal grille onto the car, simulating where it would go with the plastic part attached to it too. Check the sides - shape/bend them in place to get a better fit when you actually put it back on in its entirety*.
    Attach the metal grille back on to the plastic part. Take care not to scratch the paint and refrain from bending the parts.
    Now the moment we've been waiting for - take a step back to admire some of that handy work of yours!

    It put a smile on my face when I saw this in its final form. I was quite proud of what I made, as although it was not even close to perfect, it's not bad either for my standards! I'll definitely know now what it takes to make a better, closer-to-perfect badgeless grille.
So that's the DIY for making it. This is just Part 1 of it, and is basically what you need to make your own. Part 2 will be just about my experiences with it and some tips/improvements I would ammend to the current DIY. I will also post up pics of the imperfections that can be seen in the final product. And of course, pics of it on the car will also be up :)
Enjoy!