Materials:
- Water bottle w/ detergent+water mix
- Masking tape
- Bucket with clean water
- Waterproof sandpaper (400/600/1000/2000)
- Terry cloths/polishing cloths/applicator pads/rags
- Rubbing compound (I used Meguiars Diamond Cut Compound)
- Plastic polishing compound (I used Plexus Plastic Cleaner: Protectant & Polish)
- Torch
- Meguiars Diamond Cut Compound (MDCC) & Plexus Plastic Cleaner (PPC).
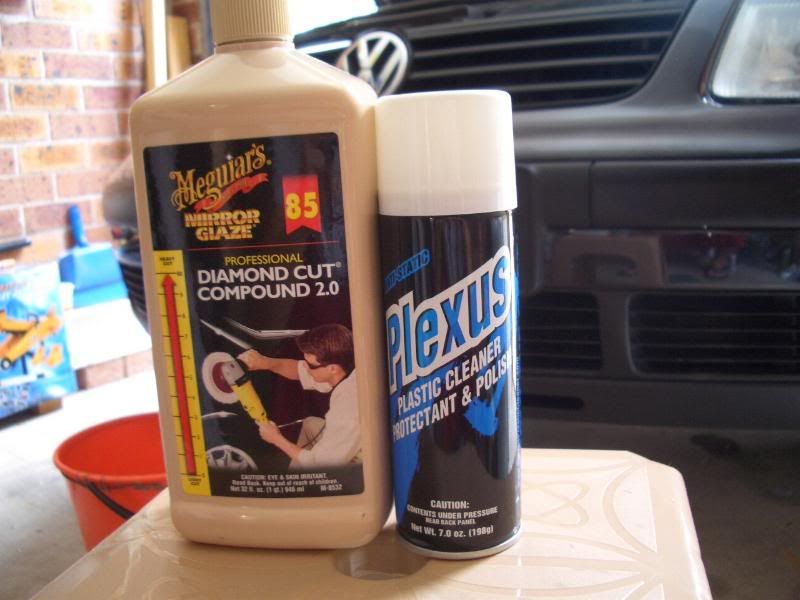 For this application, I thought MDCC was not heavy enough. I applied it about three times after the sanding and the result was far from what I hoped for. This may be due to bad sanding procedure though...
The PPC was a bit awkward and different to use. I was expecting it to be a substance similar to all the other polishing compounds I've come across, but this one was a spray in an aerosol can. It did next to nothing after the MDCC, though the sales assistants that helped me out said they had lots of good feedback for that product. I reckon the Meguiars PlastX as used by FaelinGL would have been a better alternative.
- First off, make sure you're working under shelter and that the paintwork is not hot to touch.
- Mask off surrounding paintwork as to avoid any accidental scratches. I just used newspaper but it was a pain to work around.
- Spray (liberally) the detergent water mixture on the headlights, and proceed to sand using 400 grit waterproof sandpaper. Sand in one plane (e.g. left-right), maintaining the same amount of force throughout the surface. Continually wet the surface; use a rag to wipe off any particles. About every 5-10 minutes, wash the surface with water and wipe dry - run your fingers over the surface. If the surface texture is inconsistent, keep sanding. Proceed on to the next (finer) sandpaper when the texture of the whole headlight feels the same.
- Repeat step 3 with the finer sandpaper, except sand in a different plane (e.g. up-down). Every time you check for surface texture consistency, you can check the direction of the scratches on the headlights. Use a torch if visibility isn't that great. Keep sanding until all the scratches are in the new plane. Repeat this until you finish sanding with 2000 grit (yeah it's bloody annoying, but you won't get perfect results otherwise).
- Clean with water only and wipe dry. Now, we apply the rubbing compound. Just like a car polish, work the compound into the headlights and buff off completely when it dries. Best to follow the instructions on the compound you bought. Repeat as many times as needed (three is usually enough).
- Similarly, apply the plastic polish.
- Buff out any residual polish on headlight and paintwork. Remove masking slowly and (hopefully) marvel at your work!
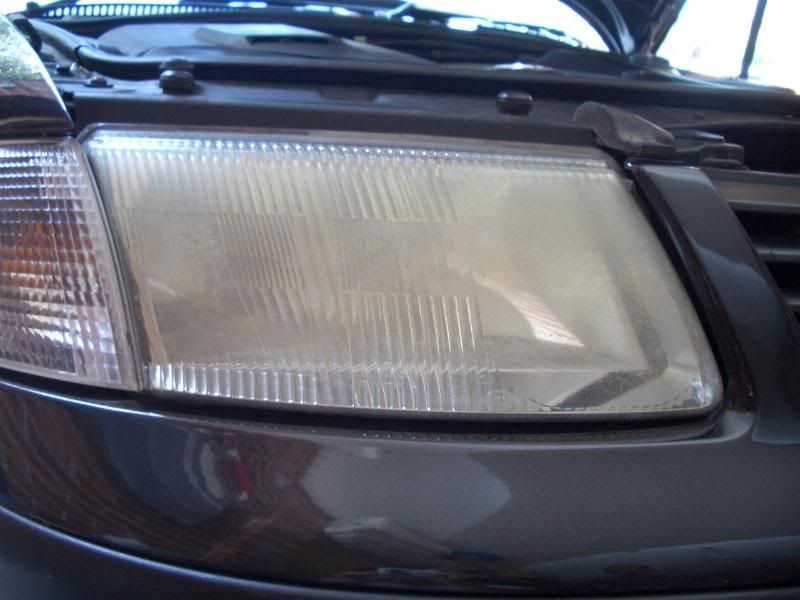
- Before:
 After sanding (notice that the yellow tinge is gone):
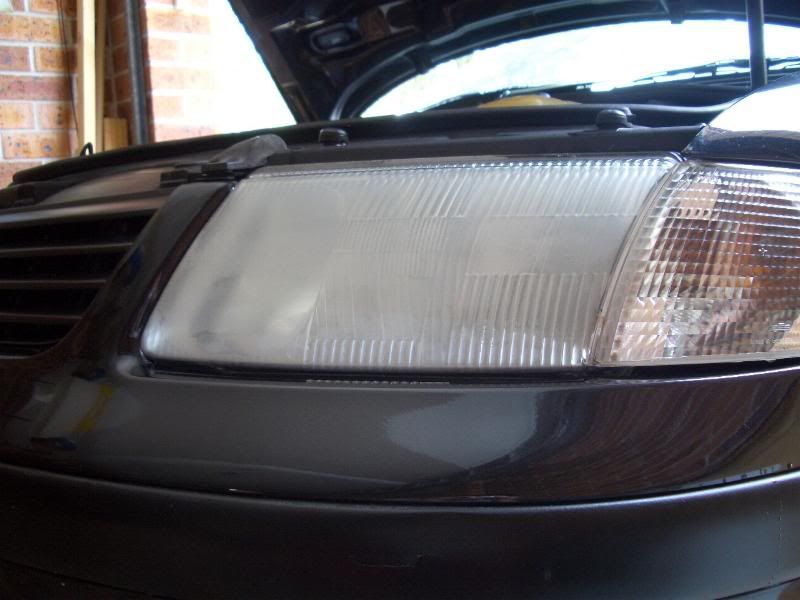 After polishes (haze gone):
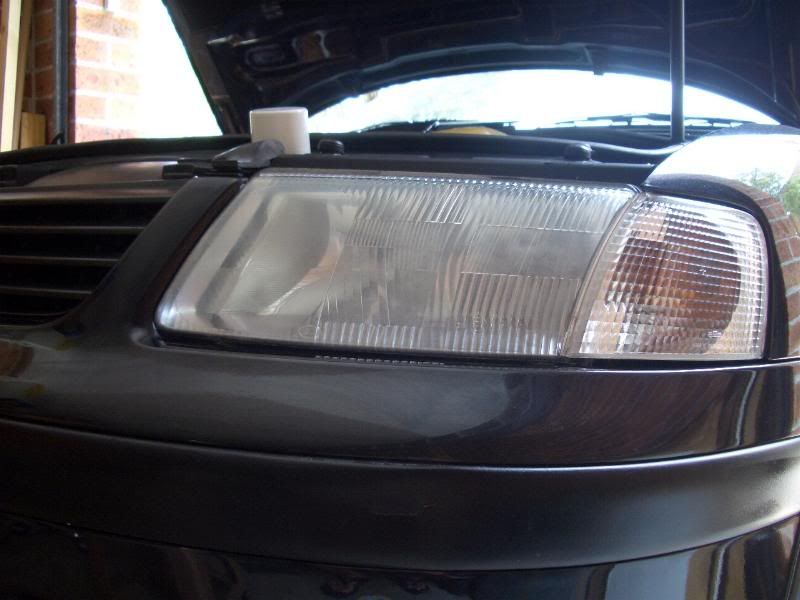
- Imperfections:
These were only apparent after the polishing work. In the first pic, you can still see bits where the haze is still present. The rest of the headlight was still not clear enough to my liking, though it was far better than what we started off with. In the second, the deeper scratches weren't sanded/polished out well enough.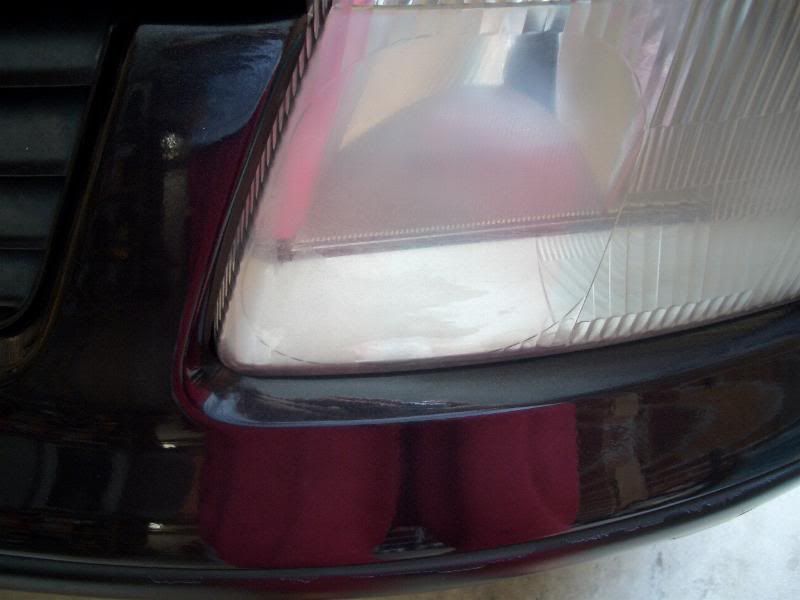
 I did this DIY with 600 and 1200 grit sandpaper, and went through it all rather quickly. 600 grit just wasn't rough enough to sand away the haze quick enough, so I reckon starting off with 400 would be best. Working through more sandpaper grades would be easier when it comes to sanding out scratches.
Just a comparison with the indicator lens: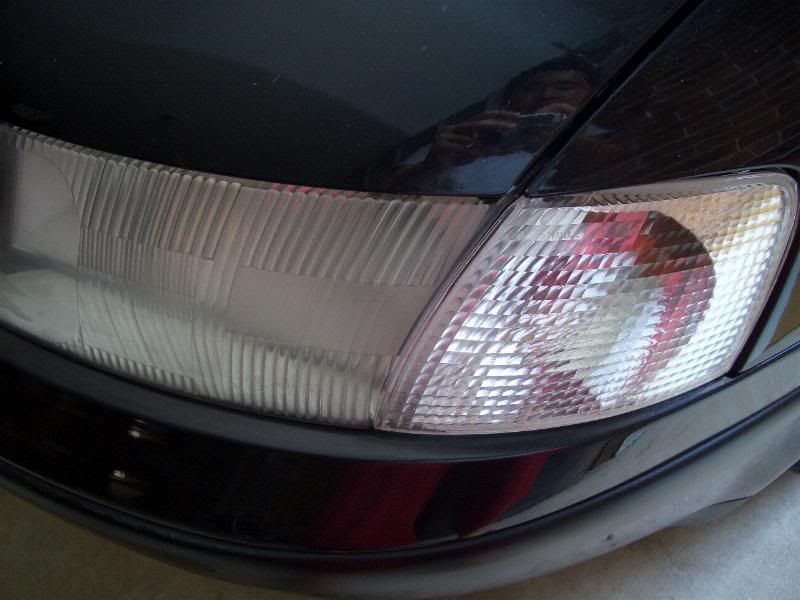 It's nowhere near as clear, but I reckon when done right, it can get very, very close.