Mk3Love

Thanks for dropping by my blog.

Just thought I chuck in a link here for those that love what my Golf is about, and why I'm so obsessively into it.


Tuesday 30 January 2007

suspension + wheel choice

so, after looking around and searching up reviews and stuff, and considering prices and my budget, i decided to get koni struts and springs. first of all, i managed to find out about GTsuspension down in melbourne. they were doing some pretty good deals on koni products, including free delivery, so i jumped at the opportunity.

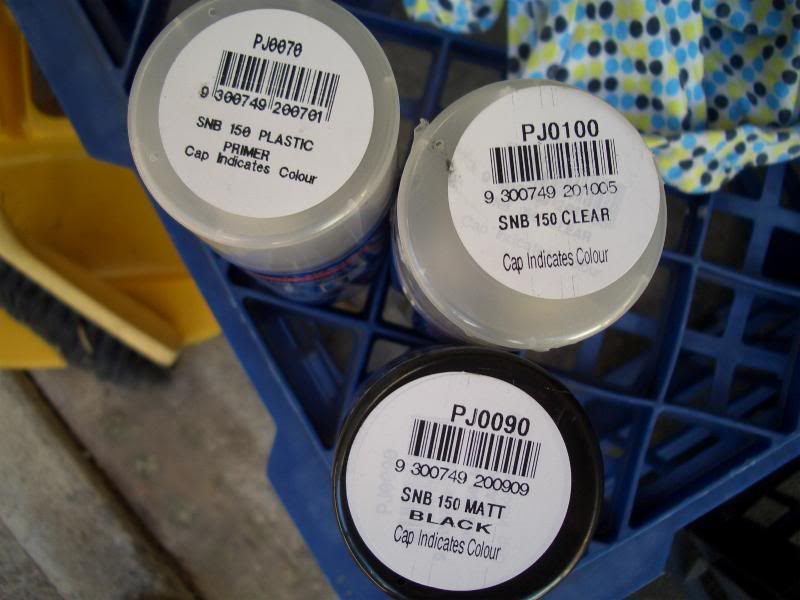
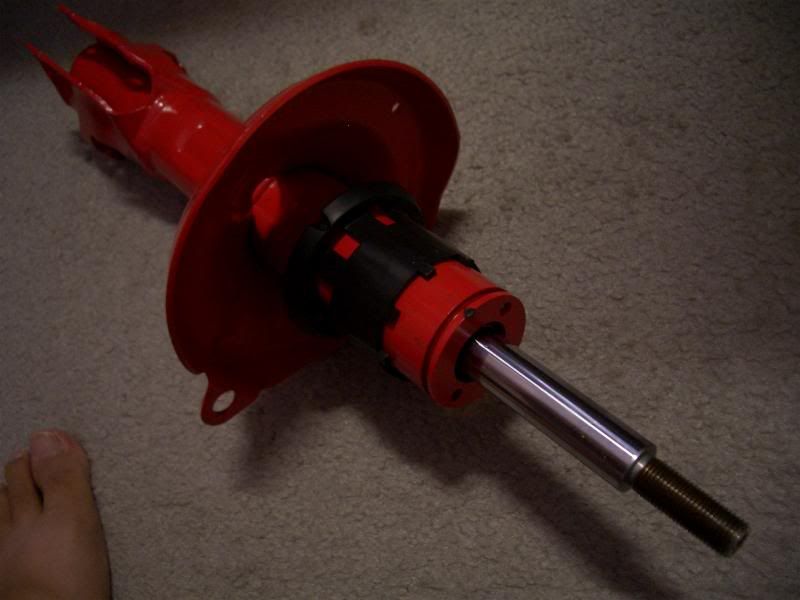
at first, i wanted to get the Koni 1130 kit, which was a strut + matched springs combo, but they've all ran out. so then, my option was to either get the koni "special" or "sport" struts, with progressive springs that's rated at 45mm lowering. the specials were slightly cheaper than the sports, so i opted for the specials. i found out later that the specials were actually the reds, whereas the sports were the yellows. prior to this, i've only ever known the different koni struts by their colours. so when i received the package, i was kind of surprised to find reds in my hands. however, it's no big deal, cos before parting my money, i did find out that the reds (specials) were a "closer to factory" spec strut, so when compared to the yellows, they are less harsh. that also meant that their damping and rebound properties weren't as fine tuned to "rough" driving as the yellows were, and their adjustment capabilities are limited to only when they're out of the car. knowing this, i did not mind buying the reds, though knowing that there's a better spec option for $200 more, i would have opted for the yellows.


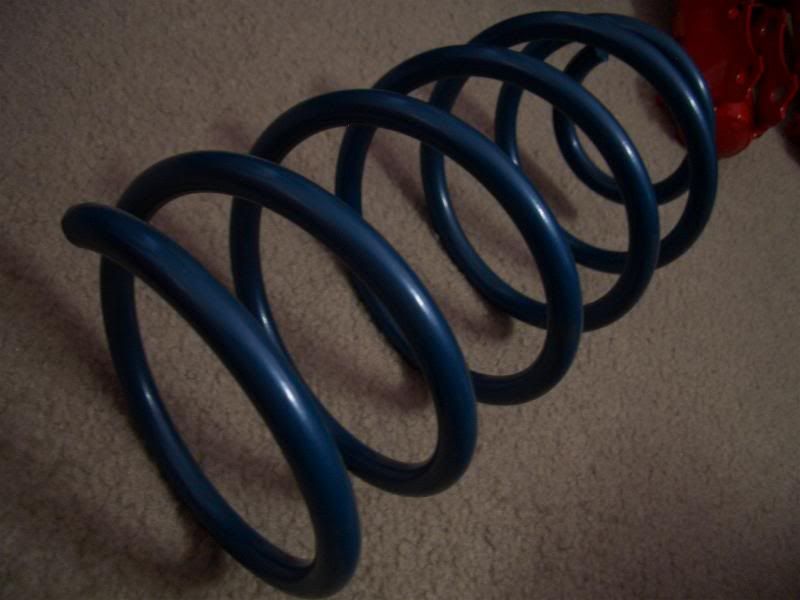
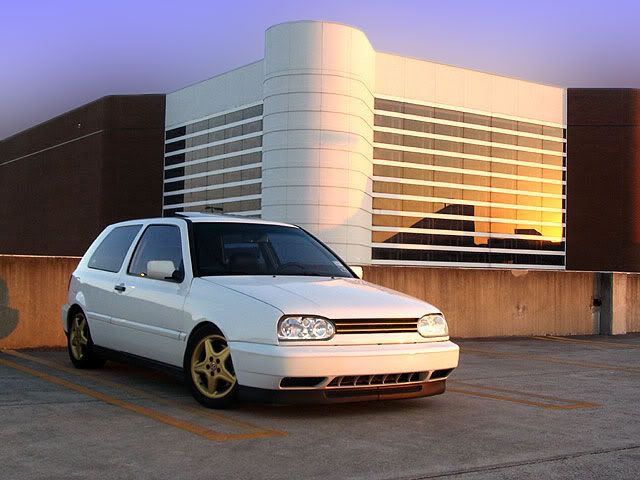
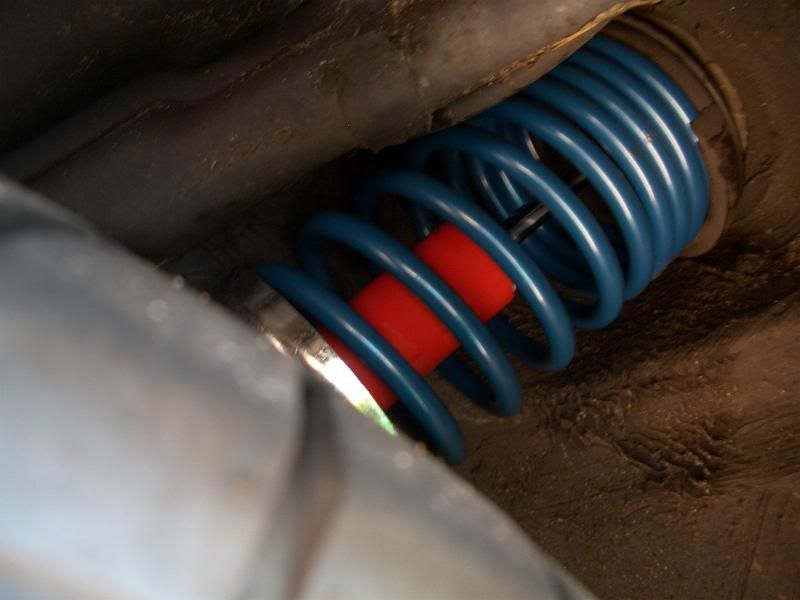
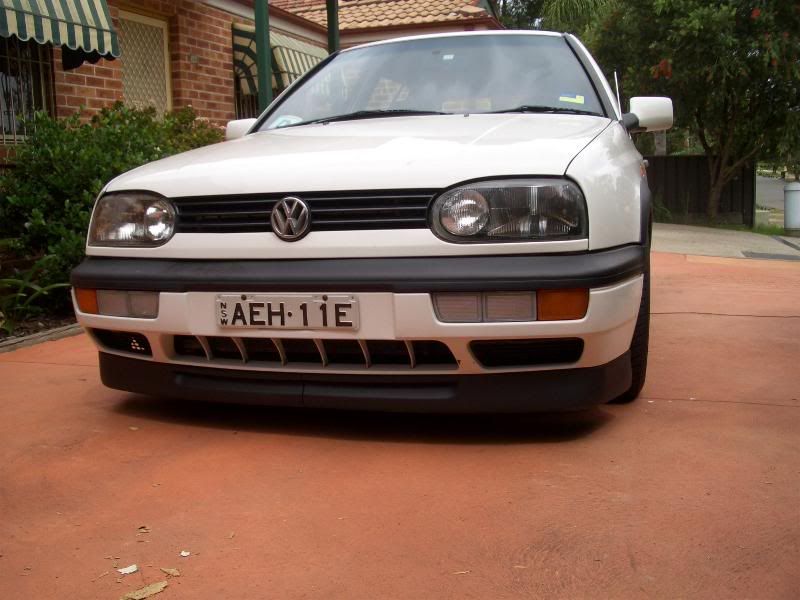
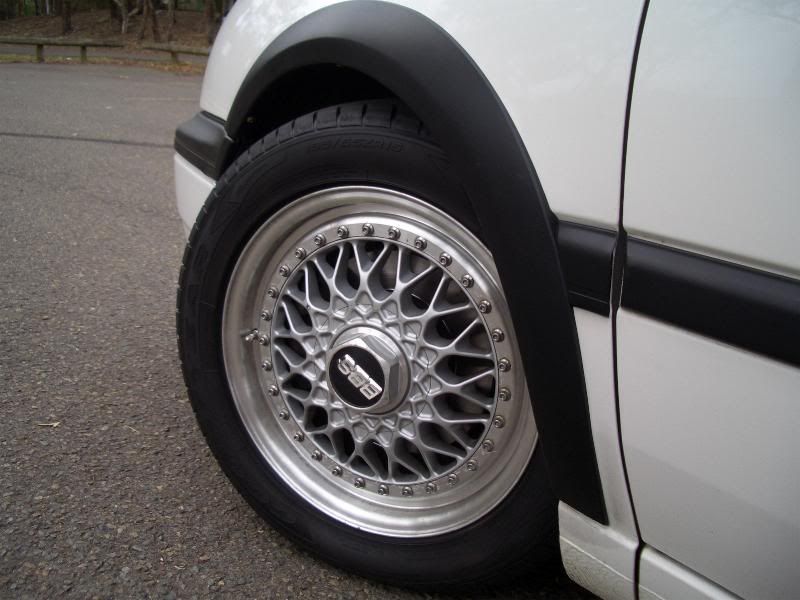
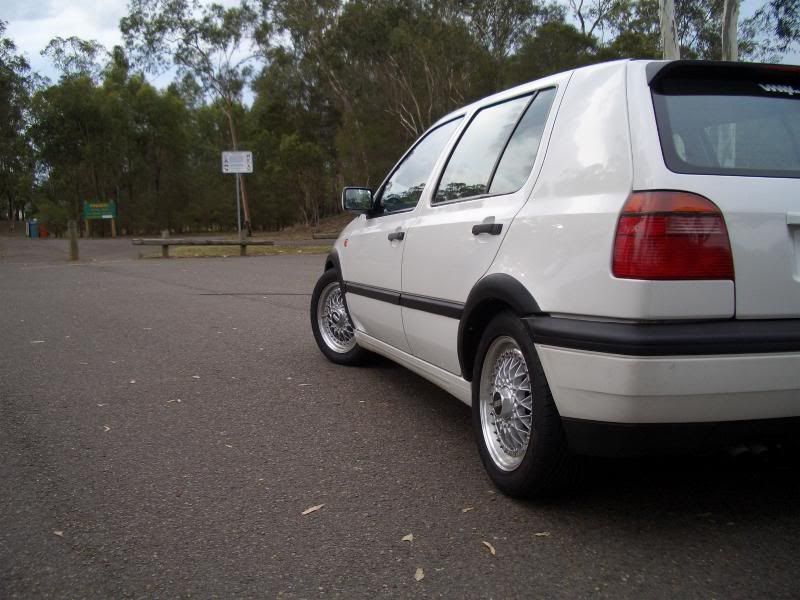
anyway, this turned out to be nothing big, cos im loving the reds and the springs at the moment. i've dialed the rears to be a bit on the hard side, whereas the fronts are "neutral". the car responds extremely well (compared to what i had to deal with when the stock struts and springs were still in, after 123,000km) and corners hard. body roll has been reduced a lot from the lowness, and the car has a better stance now. i would probably prefer it if i had the fronts dialed to the same settings as the rears, but i've already done the alignment so i dont want to mess it up. maybe in half a year or so i'll take it out again and get it a bit harder, but for now, i'll enjoy what i have.

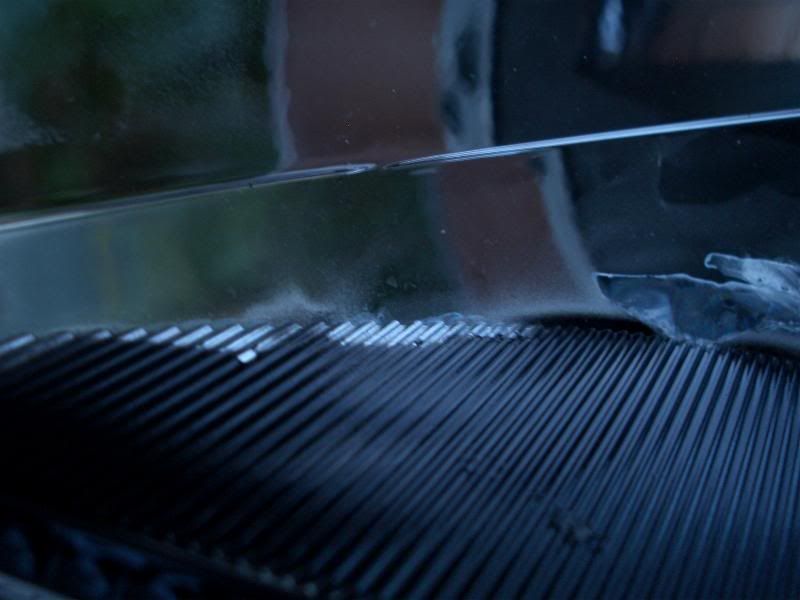
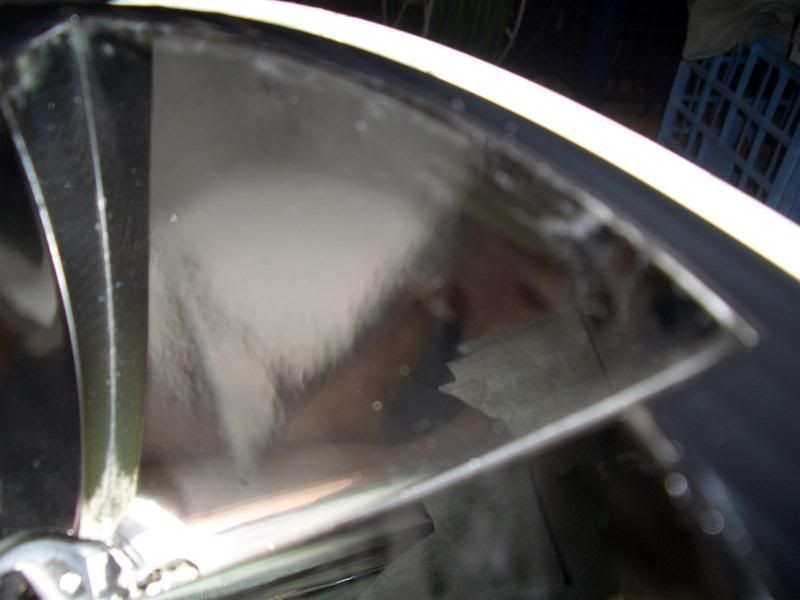
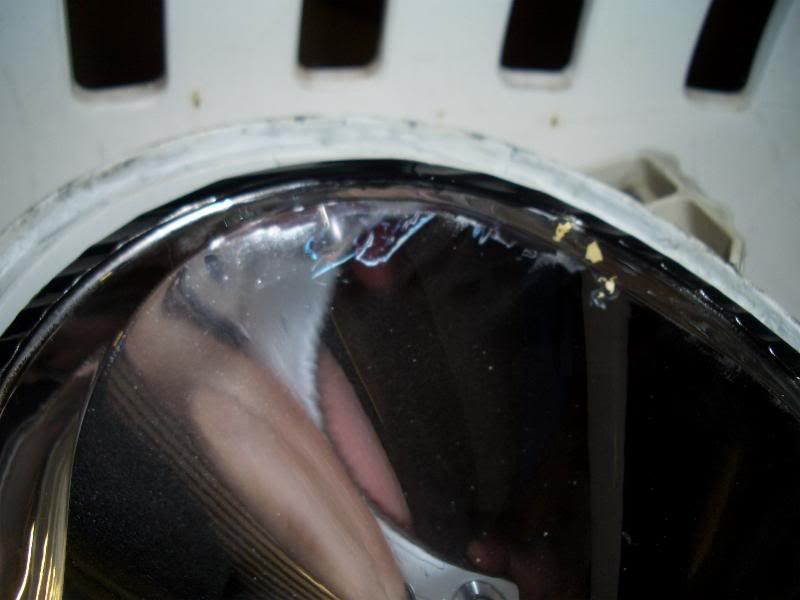
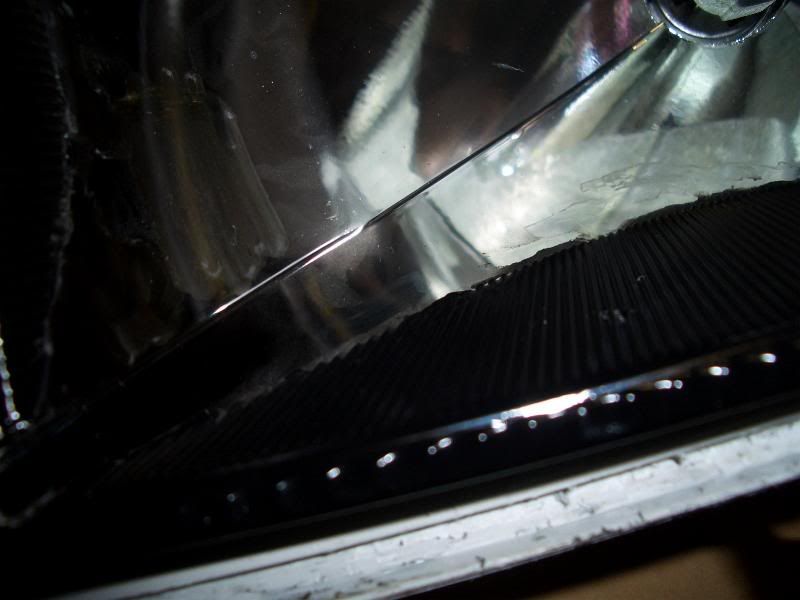
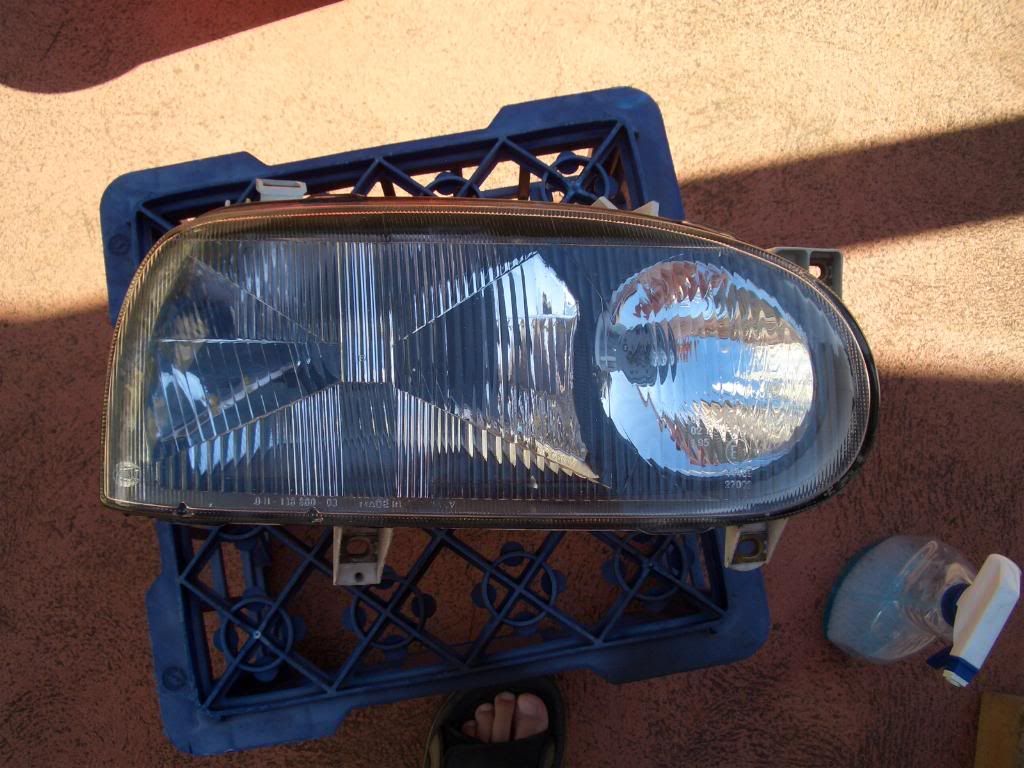
anyway, i ended up undertaking the first "big" job in modifying my car. i changed both the rears and fronts myself with some help from friends and dad. since i saw pedro do his first, i had a fairly good idea on how to do it, and didn't run into problems with the rears. they were a breeze. the fronts however, was a totally different matter. while trying to take a nut out to take apart the factory strut and mounts, i managed to break the top bit of the strut piston, totally screwing up my chance of taking the nut off in the first place. after many WD40 sprays, temporarily fixing the top hex bit with tape, and even angle grinding off the top part, i had no way of taking it out. it's an example of over-torquing a screw - it's been tightened with so much force that it has damaged the thread. i ended up going to tooley for new mounts and ended up using an old nut to hold the mount in.


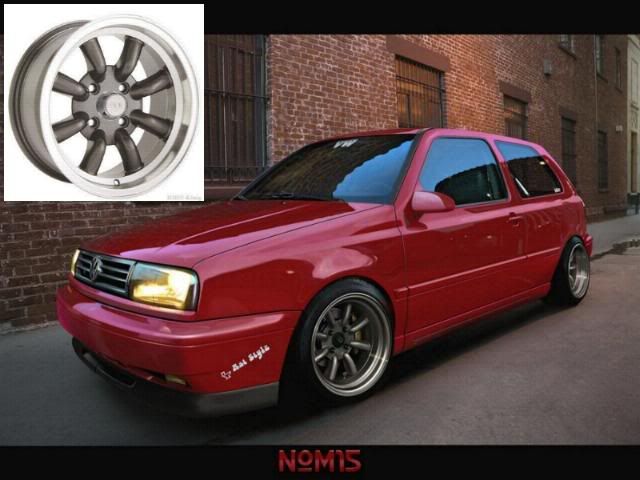
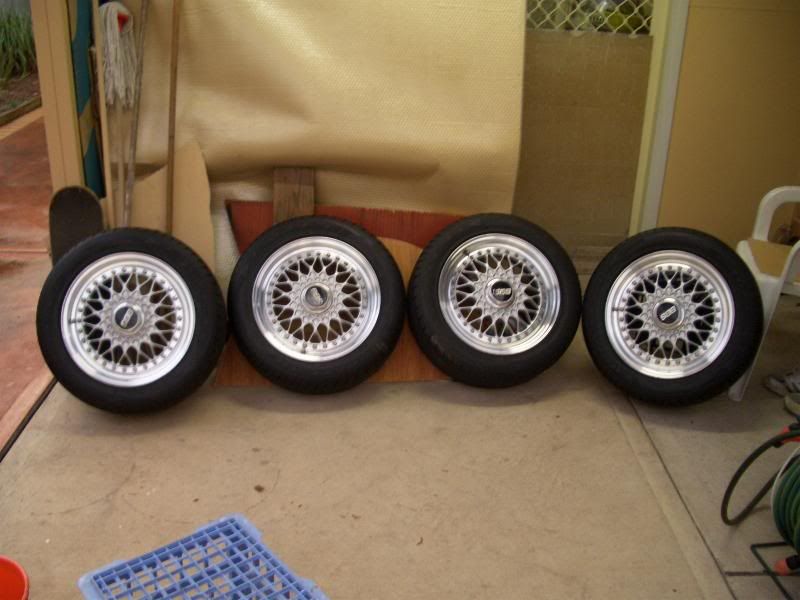
at tooley, i met with tom, owner of Mk2 and the set of BBS RS in the previous previous blog.
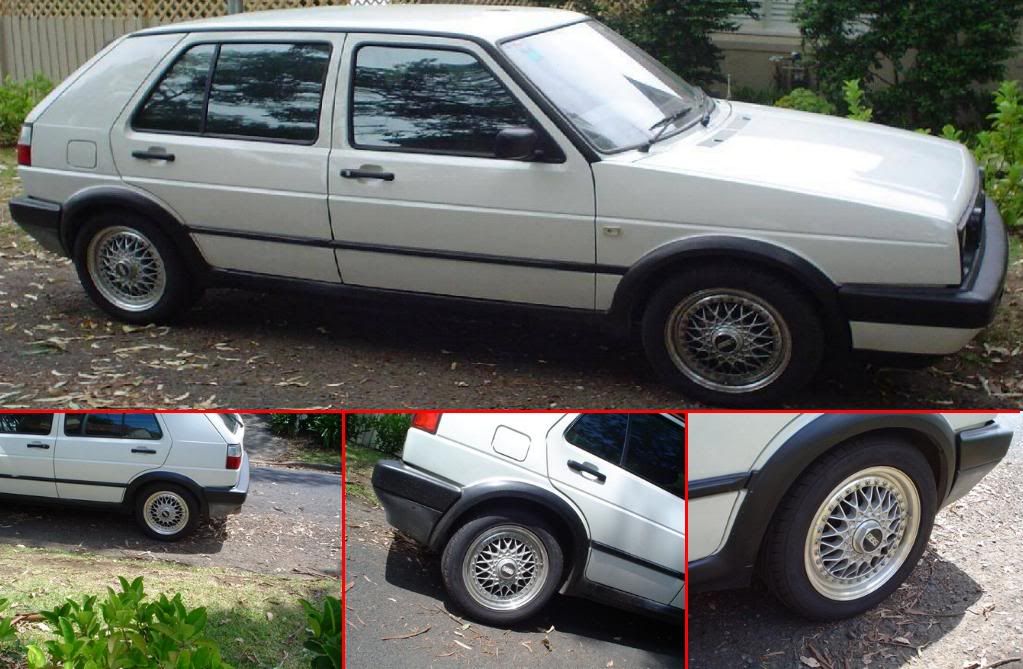
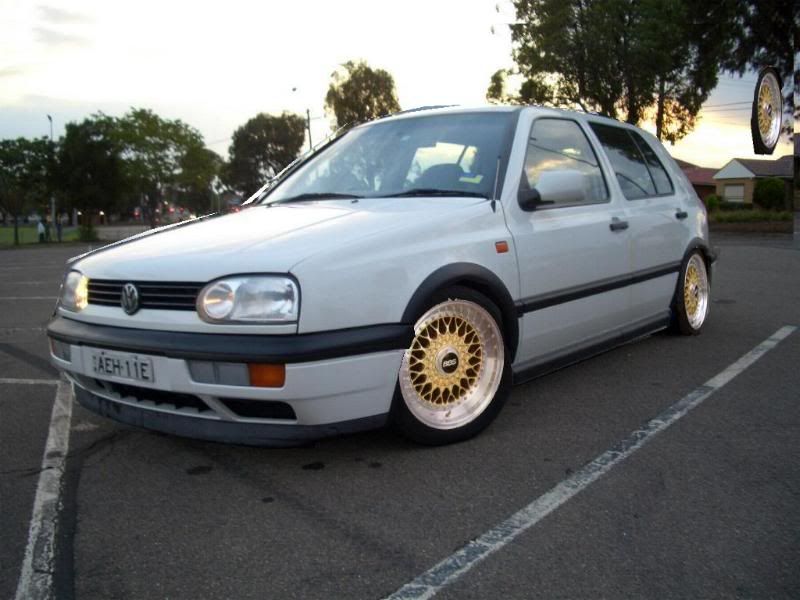
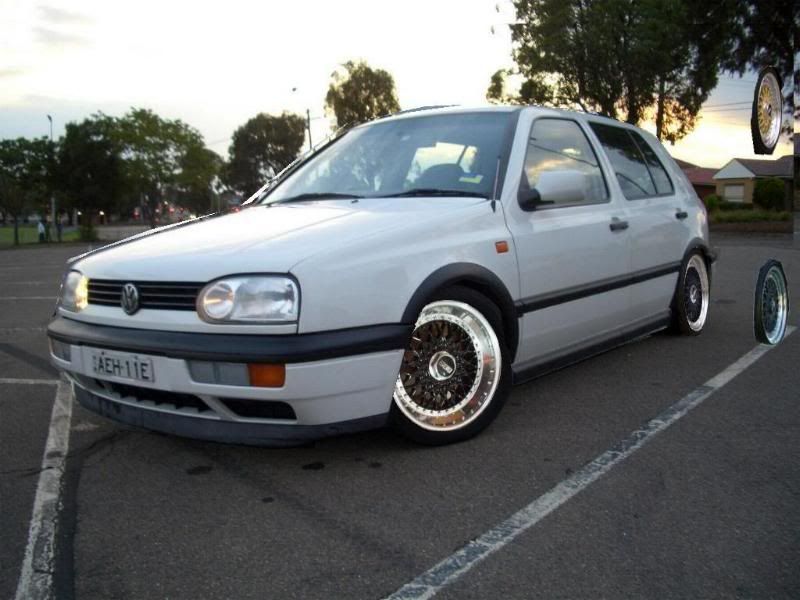
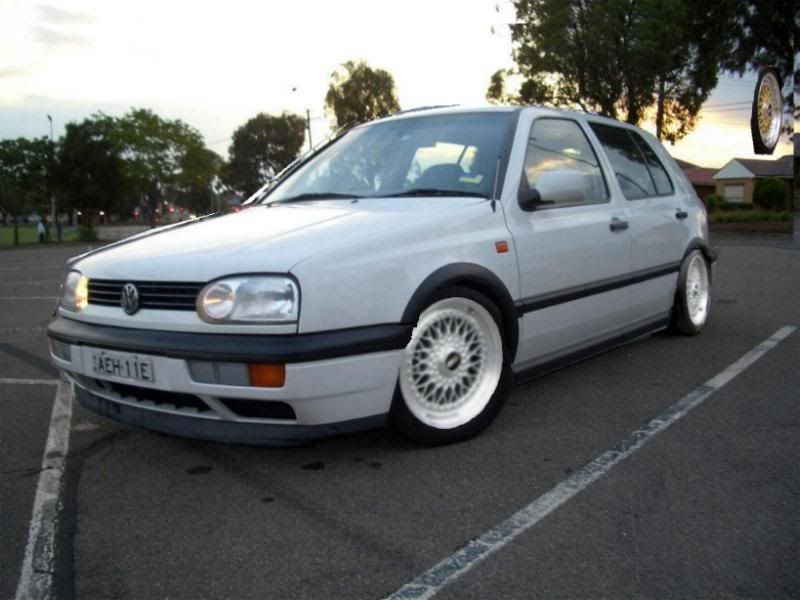
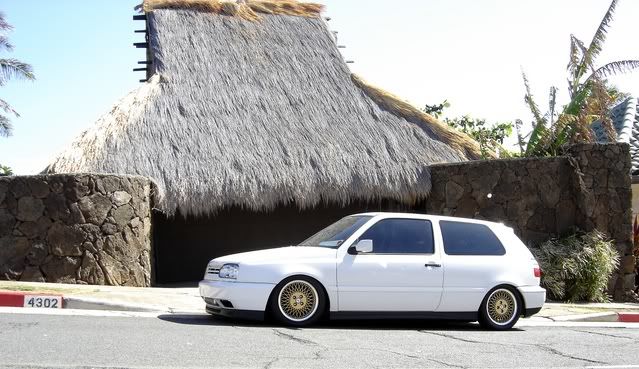
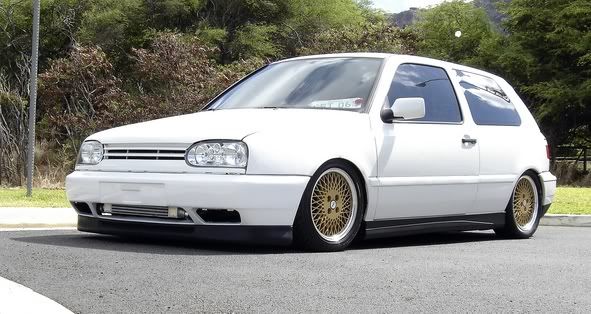
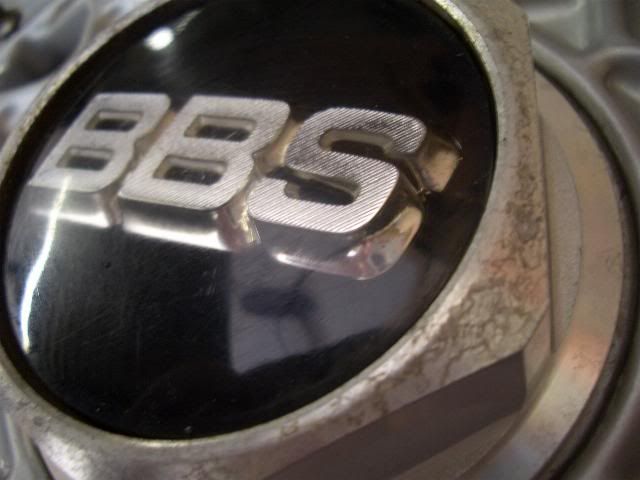
$800 later, i was the new owner of a set of 15" BBS RS wheels. they were f*ckin' dirty as when i got them, but with some off-the-shelf wheel cleaner and wheel wax, i got them looking shiny (well, as shiny as it can get) again. finger was hurting after that, but it's for the love of the BBS :)


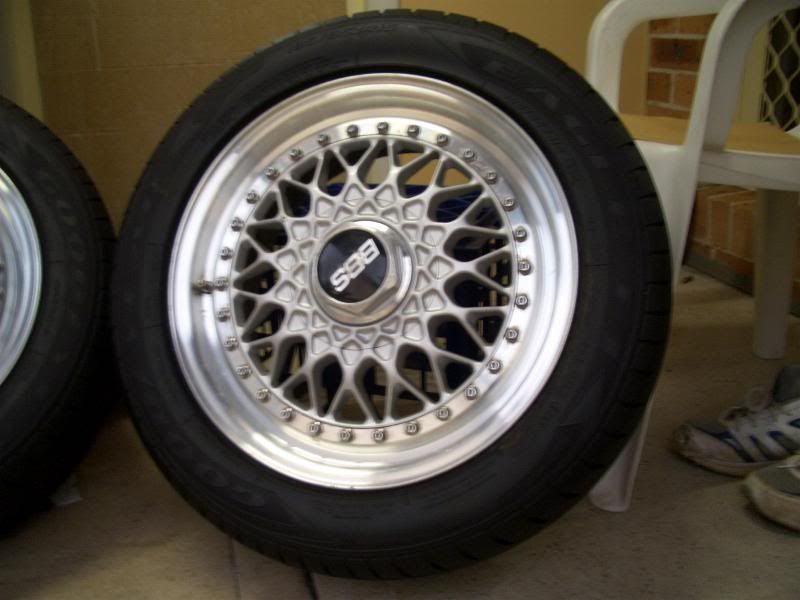
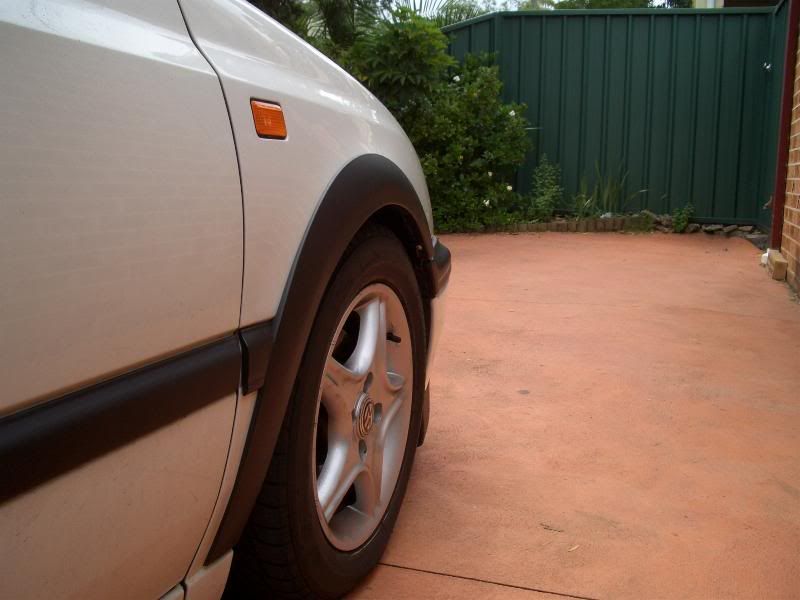
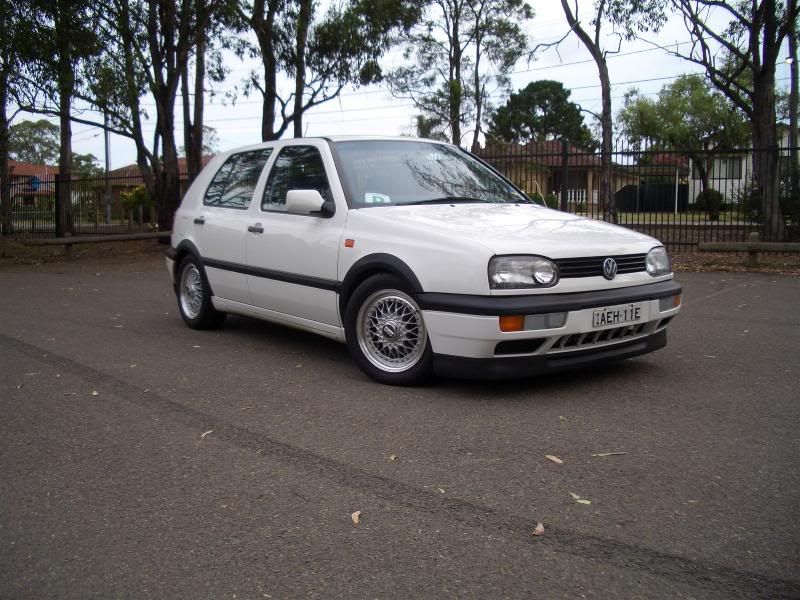
shoved them on before i lowered the car off the stands, and i was/am ecstatic about the way it looks. with fairly new 195/55 tyres (roughly ~500km) with plenty of tread, i was happy. these weren't just ordinary tyres - they were goodyear eagle F1's. they grip like geckos in the dry, and i was amazed with how well good tyres can perform. even in the wet, they gripped better than what my previous bridgestone could do in the dry. they are absolutely fun to have a fang in. i know now that one shouldn't skimp on tyres. tyres are ultimately the only things that keep you connected to the ground in a car. i have so much more control in my car now compared to what i had before. i am definitely happy about these mods i carried out.

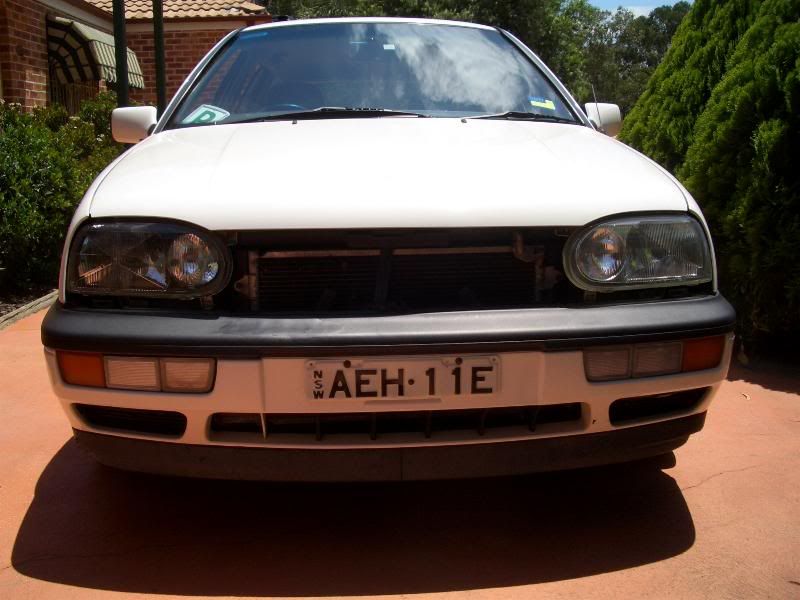
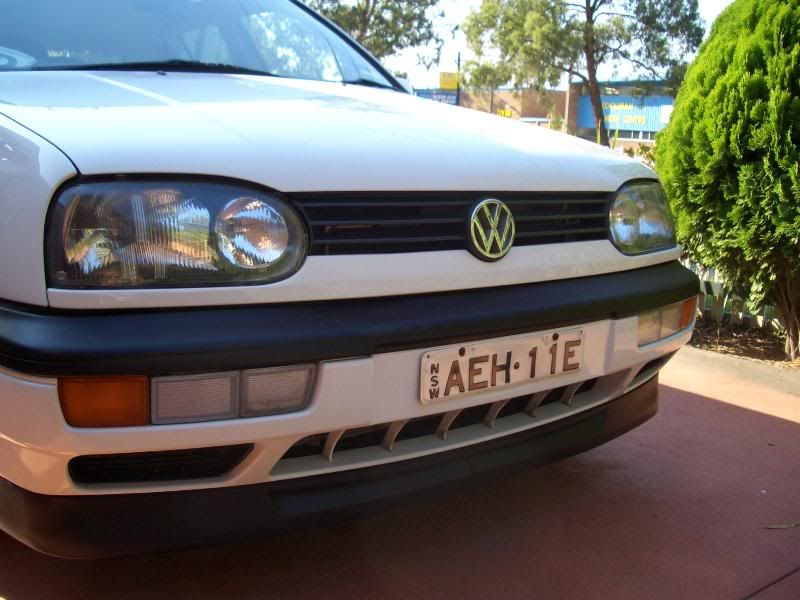
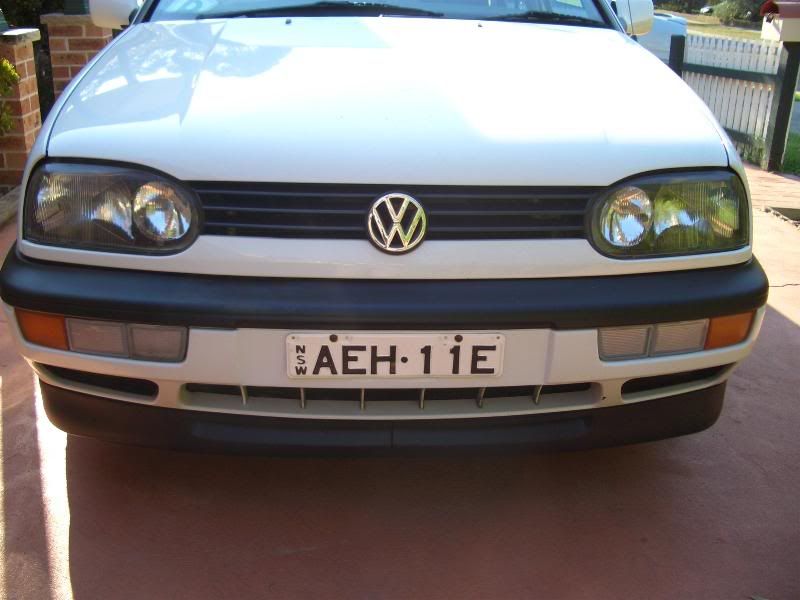
here's some quick after pics:


but i'm not completely happy yet! ;)

Tuesday 23 January 2007

VWWatercooled.org.au cruise to the 'Gong

ok, this happened some time late january, but i only managed (well, i finally can be fucked) to write about it now. went on my first vwwatercooled cruise ;)

meeting point was at liverpool krispy kremes. we were one of the first few to get there; we roughly stayed at the parking lot for about 1-2 hours waiting for more people to arrive. slowly, more mk3's came, and before we knew, all the Golf generations were being represented. GTI's were present, and so were VR6's, cabrio's, 2 door's, R32's, GL's, CL's, everything. a few Polo's and passat's were there too, along with the odd Seat and transporter van.
soon, when 35 cars were counted up, we all took down cumberland then onto the hume. there were already the turbos spooling it up and racing down ahead of the atmo's. it wasn't more than 10 minutes that we ended up taking our first stop at a truck stopping bay in a petrol station. we were already down by 5+ cars (mostly the late model GTI's) but after having a few photos taken and a quick gathering up, we were off again. down the hume we go, and what a sight. the left lane was just hogged up with modern generation VWs, with the odd gunner taking the right lane to gain up the queue.


the drive down hume then to picton road (plus a few quick stops) led us to mt keira, where we had our first proper stop. a lot of people were there already (being a sunday) and parking was hard to find. we just resorted to parking anywhere that doesn't obstruct traffic (well, sort of).


after a drink, chat and some scenic views, we started to head off to the beach. suburban driving for a large company of cars proved to be pretty hectic, and a few more were lost, though most eventually found their way. it was a f*ckin' hot day; rightly so, the beach was very very busy. parking was as hard as finding free parking at uni, but we ended up going on to the grass and had our whole fleet parked in a line. a (small) bbq was started and some food was shared around, and the rest of the day just ended up being a good chance to meet other veedubbers and having a relaxed day.


next cruise/gtg has been set up for on the 11th (sunday) of march, at la perouse :) more pics then!

Friday 19 January 2007

what wheels?!

hiiiiii

time to look for another set of wheels to wear on the Golf. these are the competitors for now, in order of my favourite choice:

BBS RS - i'm selling the BBS RS i have because they don't fit, not because i don't like them anymore (actually, quite far from that) so i'm still looking for another set of these. lucky for me, one guy in hornsby is selling a set (15x7, offset in the 30's - he says he's not sure but it's on the wheel so i'll be checking them if i'm getting that set). they look very standard so im thinking of widening the rears (putting new lips on them, possibly 1-2" ones later down the track), and might colour them:


3-piece 5-spoke: these are hot but they're damn expensive. i was quoted $660/rim by peter from ozwheels who makes these. they look like porsche rims, which it probably lends its fatness from. i would choose these over the BBS if they weren't so f*cking expensive. examples included RH ZW1's, keskin KT1 and KT2's, schmidt modern lines:


1-piece 5-spoke: look similar to the above, with the fat spokes, just without the nuts around the rim. i personally favour the 3-piece look which makes this runner-up to it. these would be cheaper, but i have no idea where to find them. 5 spokes these days in australia are just skinny ones, ones with weird designs, or fat but flat ones. i prefer the rounded ones like the above and below. examples also include the RH ZW1, borbet type T:


BBS 'modern' mesh: made famous by BMWs. i would still stick to BBS-made ones (like the RX, below) because imo they're the only manfacturer that makes them look good. would love to own a set of LM's but they're damn expensive and hard to find:


rota slipstreams: my very very first wheel choice when i was looking for rims for the golf. they're lightweight and comes in various sizes. might be hard to find though, as i dont think there are any distributors here in australia (havent researched that hard yet though). a more modern look for the golf, which im not trying to achieve.


konig rewinds: old-school look, but is it for the golf? the pic below is photoshopped and definitely makes the jolf look bloody awesome, but would i be able to pull it off? i doubt it, but i still love the look of the wheels anyway. might do a photoshop some time. these rewinds are easy to get (ozzy tyres stock them) so that's a strong point.


that seems to be all for now. when i do a photoshop of the above, i'll put it up in the photoshop post below.

edit: scrap that thought. did a photoshop and deleted it before i even finished it. looks shite.

Thursday 18 January 2007

photoshops!

i did these a while back (a few weeks ago, before i knew i was gonna sell the BBS RS) and here they are:

gold centres:

black centres:

silver centres:

now, these are really dodgy photoshops, and i've seen some silver BBS RS on white mk3's before, and they look bloody awesome, which is opposite to the above photoshop :P imo, best colour is gold. anyway, less talk, more pictures:


*drool*

wheels [updated]

*sigh* ok.

visited peter at ozwheels with the RS's. it can't be done. the centrebore, at 70mm, won't accomodate the 100mm PCD. f*ck!

but the good news is, he's willing to buy them off me for a price higher than i bought them for. so now, im back on the market for a new set of rims!

i will make another post with some rims i've got my eye on, but for now, im either looking at old school wheels (another set of BBS RS, or maybe konig rewinds - watanabe look-alikes) or some 3-piece 5-spokes. porsche wheels come to mind.

Tuesday 16 January 2007

"joey modded" my headlights

so you must be wondering, what's "joey modding"?

honestly, i dont really know, but it's the name given to a way of modifying one's headlights. it basically involves spray-painting parts of your headlight (not the lens) to a certain colour to achieve an aftermarket look to it. obviously the parts painted on the headlight does not involve the reflective parts (or else they won't function as headlights anymore) but on the surrounds of the headlights that do not affect the light output. a common colour is black; joey modding headlights to black gives it that "projector" look:


it's usually a subtle change, which i am looking for. it's a very cheap alternative too, as opposed to getting new headlights. for me, the total cost was about $30, and i now have some very nice looking headlights.

there are many ways of doing this, but here was my method after looking at a few how-to's.
(just a disclaimer, that i'm not responsible for what you do to your headlights! i am not responsible for any damage incurred while following the below instructions!)

materials needed:
  • socket tools (8mm for mk3 headlights)
  • oven or heat gun
  • flat head screwdriver (small size may be easier to use)
  • knife blade
  • sand paper
  • paint (try and find one that's resistant to heat; if using black, i used matte)
  • clear coat (not necessary)
  • nail polish remover
  • cotton buds
  • touch up paint (not necessary)
  • glad wrap
  • newspaper
  • auto sealant (or any silicone sealant, preferably in clear, white or black)
  1. take headlights off. with the mk3, the grille had to be taken off to gain access to the nuts and bolts that held the headlights onto the car. i recommend doing one at a time, just so u can see the comparison and also it's a long process and must be done carefully.
  2. now, you have to separate the lens from the headlights. this step is dependent on the materials used in your headlights. if the lens are glass and have been securely sealed on to the headlights, as was the case with my mk3, u'll need to use some sort of heating device to make the sealant more malleable. i used an oven, and this worked perfect:
    preheat oven to 150 degrees celsius. with lens face up on a tray, put the headlights into the oven. leave for a good 90 seconds.
    i don't know if a hair dryer works, but that might be worth a try.
    for those that have plastic lens, i have no idea what to do for that. hopefully the manufacturer just used clips to secure the lens to the headlights.
  3. for those that used an oven, slice around the edges using a knife blade where the headlight and lens are secured:

    keep cutting all the way around, taking out any sealant gunk that you happen to chop out.
  4. using a flat-head, lever the lens from the headlights. this should be fairly easy to separate once you've cut some of the exposed sealant out. if they don't seem to budge, place it in the oven again under 150 degrees celsius for 60 seconds. cut around the edges again if there are any sealant you can see, and try to lever it out. repeat this step as many times as required; remember that this should be done carefully and slowly.
  5. once separated, clean the headlights and the lens from the sealant gunk. i had a shitload on mine and they were a bitch to clean, but it must be done:


    again, do this carefully and slowly, and ensure that every bit is taken out. using the knife blade was easier on the lens, while the headlights i just used the flat head to try and take all the shit out. it's recommended to cover the reflective surfaces as to ensure that no gunk gets accidently threw into it.
  6. now the fun part. masking!
    mask around the headlights first with masking tape and newspaper.
    now, masking the reflective parts... u can use masking tape with newspaper, but it's very very easy to peel off the reflective mirror in big flakes if the tape is too adhesive and/or you're not careful in slowly peeling it off after painting:


    i ended up using glad wrap on my second try with the other headlight and there was much less peeling. if you decide to use tape, make sure u "wear it out" first by taping the underside of your shirt a few times first.
    Edit - use masking tape. Wear it out A LOT, so it basically has barely any stickiness left to it, but just enough to stick and cover. Both are a f*ckin' bitch to use, but masking tape may be the better alternative when it comes to the result.
  7. Lightly sand the top surface, making sure nothing falls to the masked part. We're just trying to keep it as clean as possible. If it does fall in, just try and blow it out. Paint (until you get a complete cover) then clear coat (ignore the priming process - it lifts the reflective surface and sticks it to the masking tape, resulting in a slur of expletives when you remove the masking):


    leave ample time for drying in between. while you wait for it to dry, clean your lens thoroughly. most likely they're pretty dull and not as clear as what new glass lens should look like. refreshen them up and your power output would even improve:


  8. once the clear coat has dried (give it an hour to be safe), slowly, and i mean REALLY slowly, peel off the masking, whether it's tape or glad wrap. this has to be done extremely carefully to make sure none of the reflective parts have been peeled off.
  9. now for the touch up. from what i did, my masking was pretty dodgy, so there was some slight overspray on some parts of the headlight, and also some parts that weren't sprayed on. to take care of overspray, use nail polish remover and cotton buds:


    the key is to use ample amounts of nail polish remover, and constantly change the buds after 2 or 3 swipes. for the missed spots, i used some holts touch up paint that i got from an auto store (peps, supercheap, repco etc) and just roughly went over some parts:


    here are some before photos:


    and the after:


  10. give it 10-15 minutes to dry, then it's time for the sealing. i used this which i got from bunnings:


    imo, it worked great, and gave the headlights a better look since it was black. just follow the instructions on the product and everything should be fine; use copious amounts so condensation build-up shouldn't be a problem with the headlights. try and do this within the space of 5 minutes, then put the lens cover back over the headlights, aligning it properly and forcefully hold it down so there should be no gaps:


    after the lens cover was on in the right position, i put another layer of sealant to double make sure there are no air holes. it got messy and was a bitch to clean, but should be fine.
so that's done. give 2-3 hours for the sealant to settle, then clean any excess off. use something heavy (i got my bag and filled it up with weights) and hold the lens down on to the headlights. best to keep it there for 24 hours. remember to always keep the lens cover facing up as seen in step 7. you might scratch the lens cover if otherwise, and i did this to one of my lens cover.

ok, here are the before/after (mostly after) shots:


pics here

Edit - Also, I recommend blow-drying/using acetone wipe down any moisture on the lens. I get a bit of cloudiness in my headlights (not very noticeable, but it's not crystal clear) and I deduce this from a lack of sitting time before/high humidity during the sealing process. Acetone absorbs moisture (thanks Uni science classes).